Optimal Sharp V3
If you look at Optimal Sharp V3 it is very simple to use. On the surface you have only two scripts as options:
• Optimal Sharp V3
• Optimal Sharp V3 Plus (for extra fine detail)
The results allow way more control than you may expect. Here is what you can do:
• Lower opacity to reduce sharpness
• Change the Layer Mask
o Disable the Mask
o Change Mask Density
o Change Mask with Curves
o Paint into the Mask to protect or reveal areas
• Create custom actions to automate changes
The first option is straightforward. This article covers mainly the handling of the Layer Mask.
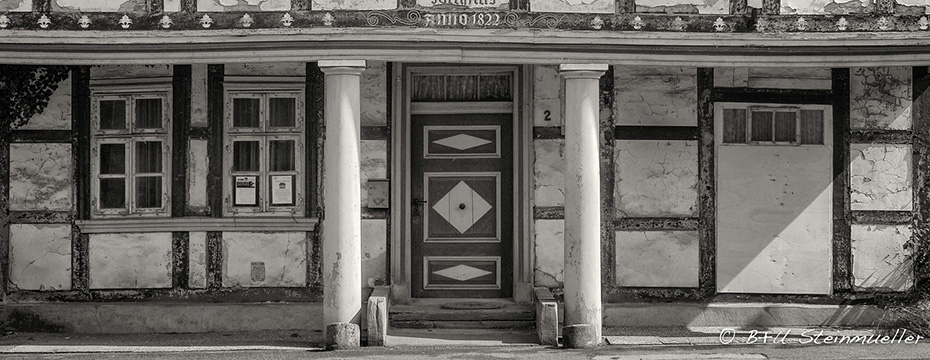
We use a crop of this image we took with the Nikon D800 and the Nikon 70-200mm f/4 VR zoom.

Where is the Layer Mask?
The Mask is hidden in the final result but can easily be revealed. Here is what your layer stack shows after using Optimal Sharp V3.

Undo the last step in History or use Cmd/Control+z:

What is the Layer Mask for?
Note: Black in the mask means the sharpening has no effect and white sharpening has full effect. All the shades in between define certain strength of sharpening.
You want to avoid sharpening of noise and the mask tries to protect flat areas (e.g. skies and also darker regions). The details sharpen in Optimal Sharp V3 Plus is very strong and would otherwise expose in some cases too much noise. The original mask is quite strong to avoid this. If your image does not show much noise and you want to sharpen stronger you can change the Layer Mask.
Disable the Mask
If you disable the mask you can get the strongest sharpening possible at the expense of noise sharpening and in some cases wider halos (e.g. buildings against the sky).
Change Layer Mask Density
The easiest way to get stronger sharpening is to change the Mask Density. Select the mask and use the Mask panel:

This will change the density of the mask by making all values brighter. Brighter mask values means more sharpening in our context. Density of zero is equivalent to disabling the mask.
Change the Mask via Curves
Quite often we want still to protect the flat regions but sharpen the rest stronger.
Sample crop:

Here is the original Mask:
 Original Mask
By applying a Curve to the mask (Option/Alt click the mask):
 Curve
Curve
Note: Don’t worry that this curve is applied to the image, it only effects the mask
The layer mask now looks like this:

As you can see many areas get now stronger sharpening while the sky is still protected. Here is the sharpened crop:

Of course you also can lower the mask density to get even more fine details.
Paint into the Mask to protect or reveal areas
We only mention this option because we hardly use it. But you can also paint black/darker gray in areas that should not be sharpened or reveal stronger sharpening using white/light gray.
Create custom actions to automate changes
We often want to reuse the mask changes we created. In this case we record actions that perform the needed changes. You can download a sample action from here.
How to load actions can be found here.
Use:
• Run Optimal Sharp V3 (Plus)
• Run Action
Conclusion
Sharpening with Optimal Sharp V3 can be well customized for your taste, cameras and scenes. Find more about Optimal Sharp V3 from here.
Uwe Steinmueller / Editor+Owner of Digital Outback Photo
PLEASE RATE THIS STORY! [ratings]