
Sony 35mm FE f/1.4 ZA Lens Teardown

Lensrentals.com, 2015
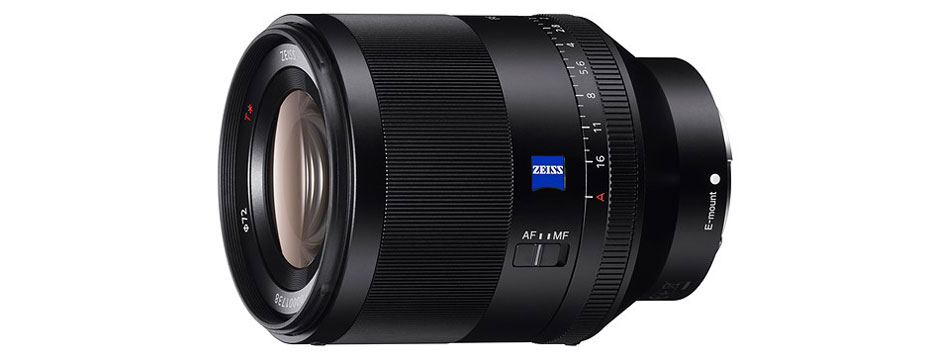
Before we start, let’s be sure we’re all on the same page because this teardown of the Sony 35mm FE is going to be very different from the other lenses we generally tear down. The outside of the Sony lens may look fairly similar to the Canon in the picture above, but their internal construction is very different.
Sony FE lenses do NOT have all of the same things inside that other lenses do. Sure, they have glass elements, barrels, and weather seals. But where other lenses have helicoids that move focusing elements along grooved tracks, Sony FE lenses use electromagnets to move the focusing elements along a set of rails. Which system is better? I have no damn idea and neither do you. I doubt Sony does either, yet. But give credit where it’s due: Sony thinks outside the box and tries new stuff no one else is trying.
Last week we opened up a Canon 35mm f/1.4 mark II lens and were excited about the great build quality. Today we’ll open up the Sony 35mm FE f/1.4 lens and I’m excited about seeing some new and different technology.
There are a couple of specific things I am curious about. We’ve noticed is the Sony 35mm FE f/1.4 doesn’t seem to have autofocus failure as frequently as some earlier FE lenses did. We did a teardown of the Sony FE 24-70 f/4 lens, showing some weaknesses in the electromagnetic AF system. We’ve been inside the 55mm FE f/1.8 lens and it has a very similar system. So we suspected the system was different in the Sony 35mm FE lens, which hardly ever fails. Sony also states this the Sony 35mm FE lens is dust and moisture resistant, and I’m always interested in seeing how well those claims are backed up.
So Let’s Take Stuff Apart In The Sony 35mm FE!
I usually make a joke about getting out your own lens and following along at home as we do teardowns, but really, don’t try this one at home. The Sony 35mm FE is a complex and difficult teardown and if you mess it up, well, repairs for the Sony 35mm FE lens, in the U. S. at least, are breathtakingly expensive.
The first step in this disassembly is simple but hard to do. As with most lenses, the front makeup ring has to come off. But on the Sony 35mm FE it isn’t a simple decal, it’s a metal ring stamped with the serial number and heavily glued in place. Removing it requires heat, glass friendly prying tools, and patience.

Lensrentals.com, 2015
Looking under the makeup ring, we see the usual 3 screws holding the filter barrel in place. Like the Canon lens we just tore down, this makes replacing a dented filter barrel (this lens has a metal shell, so a dent is more likely than a crack or break) simple.

Lensrentals.com, 2015
The filter barrel fits snugly but comes off easily, and there is a nice ring of foamed rubber to provide sealing.

Lensrentals.com, 2015
Once the filter barrel is removed, we got an impressive surprise. Underneath the filter barrel, around the top of the focusing ring, is a thick rubber seal providing another weather shield.

Lensrentals.com, 2015
Now that we can examine the front group we can see there are shims underneath each of the three screw locations holding the group in place.
Lensrentals.com, 2015
After removal, it’s apparent that there are different numbers and sizes of shims at each of the three locations, so these are adjusting the tilt of the front group, not just the spacing between lens groups.
Lensrentals.com, 2015
The front group can be removed now. Probably the thickest rubber seal we’ve ever seen in a lens is in place around the base of this group. With all of the seals we’ve seen already, I’m most comfortable the Sony 35mm FE lens is really weather resistant, at least in the front.

Lensrentals.com, 2015
I want to emphasize that what we call the front group is the optics for the glass for the entire front half of the lens in one unit — everything in front of the aperture assembly.

Lensrentals.com, 2015
There are spanner rings around the front element and the rear element (shown in the picture below).

lensrentals.com, 2015
Removing the front spanner ring lets us take out the front element (sitting in a rubber cone in the photo below).

Lensrentals.com, 2015
You may have noticed the white ring under the front element. That is yet another thick rubber gasket, both seating the element firmly in the barrel and of course, providing more weather and dust resistance. You can see it more clearly from beneath the element in the image below.

Lensrentals.com, 2015
The internal spanner holding the rear group in place is nice and sturdy.

Lensrentals.com, 2015
The rear element is fairly thick and tightly seated in the barrel.

Lensrentals.com, 2015
There is one element left inside the front assembly, held tightly in place from a spanner ring behind it. We had a reason to check for all this: In some lenses the central elements are simply stacked with spacers, only the front and rear groups are held in place with threaded spanners. Internal groups can shift around with a drop or jar in that case. With the FE 35mm f/1.4 that won’t happen, each group has its own spanner ring. On the other hand, there are no optical adjustments that can be made here. The entire group can be tilted on shims in the front. The group can also be rotated and inserted in one of 3 directions (which may help with tilt if the shims don’t adjust it enough). But that’s it.

Lensrentals.com, 2015
With the front completely disassembled we can look into the barrel and see all the way down to the aperture ring. You can see several screws holding the filter barrel and aperture assembly in place, but we can’t remove them yet because their flexes are still attached to the rear barrel.

Lensrentals.com, 2015
it’s time to get around to the back end of the lens and start taking that apart. The bayonet mount comes off in the usual fashion.

Lensrentals.com, 2015
With Sony lenses, it’s generally simpler to unhook the flex from the electrodes to the PCB, rather than remove the electrodes from the mount.

Lensrentals.com, 2015
The PCB is pretty usual, although it has one interesting feature: there is some heat-sink putty behind one of the chips, I assume to avoid any overheating.

Lensrentals.com, 2015
With the PCB out the 4 screws holding the rear barrel on can be removed.

Lensrentals.com, 2015
The aperture click switch is then taken out as the rear barrel is removed.

Lensrentals.com, 2015
The switch itself is strictly a mechanical lever with no electronics. It’s good to see that even this switch has a rubber gasket.

Lensrentals.com, 2015
With the switch removed, the rear barrel slides right off. Notice there’s another rubber foam gasket sealing the rear barrel to the aperture ring.

Lensrentals.com, 2015
Now we can see where all those flexes from the PCB were going.

Lensrentals.com, 2015
The one held in place by a screw perked our interest right away. It is the sensor detecting focus position. If you look to the right edge of the picture below, you’ll see a small silver square. That is actually the back end of the focusing electromagnet.

Lensrentals.com, 2015
While we’re looking around the rear barrel, here is the slot where the aperture click mechanism, which we removed earlier, inserts (red line). Moving the click-declick switch shifts the plastic tabs of this inner piece from one slot to the other.

Lensrentals.com, 2015
With the barrel off, this piece lifts right out of its location.

Lensrentals.com, 2015
The little post (out of focus and pointed to with the forceps) inserts into a white plastic plate with spring loaded ball bearing that actually provides the clicking sensation you feel when you turn the aperture ring. There isn’t a lot of stress on any of this and it may well hold up forever, but I’m always a little nervous when I see a plastic post moving another plastic post that moves a lever.

Lensrentals.com, 2015
There’s one long flex to unthread through the rear barrel, then the filter barrel and aperture ring can slide off. The long flex cable relays manual focus adjustments to the PCB. Despite the mechanical ring with its nice mechanical clicks, the aperture is controlled electronically.

Lensrentals.com, 2015
This white plastic slider with brushes underneath is the aperture sensing / controlling mechanism.

Lensrentals.com, 2015
With the focusing barrel removed the screws holding the aperture assembly in place are exposed.

Lensrentals.com, 2015
The aperture assembly comes out in one piece.

Lensrentals.com, 2015
Underneath where the aperture assembly was, is a thick metal plate, held in place with 4 screws.

Lensrentals.com, 2015
With the metal plate removed, we’ve exposed the plastic plate that is the top of the focusing assembly. You can see the indentation for the aperture motor at the top. The forceps are pointing to a round area where one side of the AF system anchors, while the half circle across the lens from that is the other side of the AF track over the electromagnet. The glass element we’re seeing here is the actual focusing element.

Lensrentals.com, 2015
Notice also there’s a set of soft rubber bumpers on the plastic housing of the focusing element, separating it from the metal plate we just removed. You can’t see them yet, but there’s an identical set on the other side of this plate.

Lensrentals.com, 2015

Lensrentals.com, 2015
To take the focusing system out, we have to desolder the electromagnet from its electrical supply.

Lensrentals.com, 2015
With the motor wiring disconnected we can remove the screws holding the focusing assembly in place and slide it out of the barrel.

Lensrentals.com, 2015
You can tell already that this is a very different from what we saw in the FE 24-70 f/4 lens. The magnet is is deeply encased in a plastic holder, the rods the focusing element moves on are thicker, and the plastic encasing the focusing group is wider and thicker. Notice the (out of focus) peg across from the motor. When you look at the now empty barrel you can see the metal post that inserts inside the peg, across from the hole the electromagnet fits in. The inner ring in the assembly above slides up and down on the two poles (the second pole is just visible under the electromagnet) when the lens is focusing. Even these are a lot sturdier than what we saw in earlier Sony lenses.
Lensrentals.com, 2015
Looking back at the focusing group we also note that the focusing element is secured not just by a dot of glue (as with the 24-70), but also by a screw tightened metal C-clamp where the forceps are pointing.

Lensrentals.com, 2015
That’s what the Sony FE lenses do instead of having rollers, collars and helicoids, and why you won’t read comments about how heavy duty the collars are in this lens. It doesn’t need any. All I can compare this focusing group to are the two other FE lenses (24-70 f/4 and 55 f/1.8) that we’ve taken apart. Compared to those this does indeed appear to be a much more solid construction and I can see why we don’t see AF failures with this lens.
Summary
Let me start with the things that are obvious. This lens has the most rubber gaskets I’ve ever seen. The weather and dust resistance in the lens itself should be superb. I’m still concerned that there is not rubber gasket where the lens mounts to the camera or under the bayonet mount. I would suggest, therefore, if you’re taking this out in weather a little additional seal at the lens-to-camera mount would be a good idea. A thick, snug, rubber band would probably do the trick, or a plastic bag around the camera and lens mount. Other than the mount, I think the rest of the lens would be fine in a hurricane. I’m always cynical about weather sealing, but this lens is amazing in that regard.
The lens has a ‘metal shell over polycarbonate internals’ construction, which is pretty standard for ‘metal’ lenses. The inside components do seem well constructed, held in place with numerous long, heavily threaded screws through fairly thick polycarbonate pieces. That metal plate that separates the focusing assembly from the aperture should add additional strength and stability (although I doubt that is its primary purpose). Overall, I think this lens is well made and should hold up well to normal use and abuse.
From a repair standpoint, the filter barrel should be easy and inexpensive to replace. The front element could be too, but Sony doesn’t sell just the front element; the part for replacement is the entire front group, which is unfortunate. Front elements get scratched and in this case, it’s very expensive to replace. This is one of the rare lenses where I would recommend using a protective front filter and keeping the hood on. (I will add this may not be just an arbitrary decision on Sony’s part. We’ve replaced just the front element in-house and found that the front group then had to be reshimmed and rotated to get the optics back to OK. It was time consuming.)
The one negative is that the Sony 35mm f/1.4 does not have much in the way of adjustable optics; just some shims to adjust tilt in the front group. That doesn’t make the optics bad, and some good, low variation lenses don’t have much in the way of adjustments. But that is why I’ve said several times that optically adjusting a decentered copy of this lens isn’t likely to be successful; there’s not a lot of adjustment to work with. Whether this is just the norm for all lenses made for this mount, or whether other manufacturers making lenses for FE mount cameras have more adjustment options I can’t say. Yet. We have some more teardowns to do.
And let me close by saying the malignant fanboyism, both pro and con, that the hate that the new Sony lenses are generating is just inappropriate and not useful. Sony is boldly going where no camera manufacturer has gone before. They’ve brought out more new technologies in the last couple of years than everyone else combined. We all want new technologies. But new technology often takes a couple of generations to fulfill its potential.
The Sony 35mm f/1.4 doesn’t give me everything I want in a lens. But it really does show that Sony is learning and improving with each product. The autofocus system is much more robust in this lens than in previous ones. The weather / dust resistance is phenomenal. The build construction is good. The optics, well, I think perhaps that may be a generation away.
Roger Cicala and Aaron Closz
December, 2015
This story was originally posted on Lensrentals.com and is posted here with Roger’s permission.
Please rate this story, and share it with your friends? [ratings]