Frequency Separation Retouching Your Portraits
We have our studio portrait beautifully lit and composed just the way we want it. However, thanks in no small part to our excellent lighting, our remarkably sharp lenses and our high megapixel camera, there are a few problems. The model did not have perfect skin so there are a few zits. Flaws that detract from the final image. We need to retouch the file.
Everyone knows there are literally thousands of ways to approach the retouching of a photograph. It is a huge business, ranging all the way from top professional retouching laboratories down to solo freelancers retouching AutoTrader ads. Just check YouTube or Google for the keyword “retouching” and check out a few of the thousands of results. Options for how we choose to do our retouching are overwhelming in numbers. Plugins and Photoshop actions abound. Numerous companies offer custom filters, looks, adjustment tools, curve sets, etc. The whole idea of retouching a photograph can be quite a confusing situation to a new photographer just starting out, as well as seasoned pros trying to keep up with the latest tools.
With so many choices available, I try to go for what gives me the best return for the least time investment. Like most photographers today, I spend far too much time futzing around in front of a computer when I should be outside shooting with my camera. Long ago, I shot my daily rolls of film and dropped them off at the pro lab in the evening. My lab in Santa Fe had extended drop off hours until 8:30PM so those sunset shots could be included in my day’s work. I’d go back in the morning to pickup my processed film from the day before, and pick my winners. Today, those lab hours are about the same, the only difference being it is me putting in those hours using a computer, not the lab technicians processing my film. I am the laboratory and I hate it. But shooting people you learn zits are a way of life and perfect skin is something only seen in retouched photography and rarely exists in nature. For my own needs I want professional level retouching results with the least investment of time. I also need to retain methods that do not compromise my degree of control over the quality of the final image.
Once I have eliminated files with captures that have unwanted camera movement or fail due to composition or lighting errors, pretty much everything else falls into one of two categories: Areas of color or texture in need adjustment. Here is an easy and relatively new method for dealing with these specific problems which is currently gaining favor with professionals. One I find to be very effective; I use it myself. It is called “Frequency Separation Retouching.”
What is Frequency Separation Retouching?
Frequency separation helps make retouching a portrait fast and easy in Photoshop. Frequency separation works because it allows you to separate the texture of an image from the tone and color. When retouching you can focus on just the texture or the colors in the skin beneath it. It sounds quite complex but in practice it is quite simple. If you want to work with texture, choose the high frequency layer, if you want to work with skin choose the low frequency layer.
Getting Started with Frequency Separation Retouching
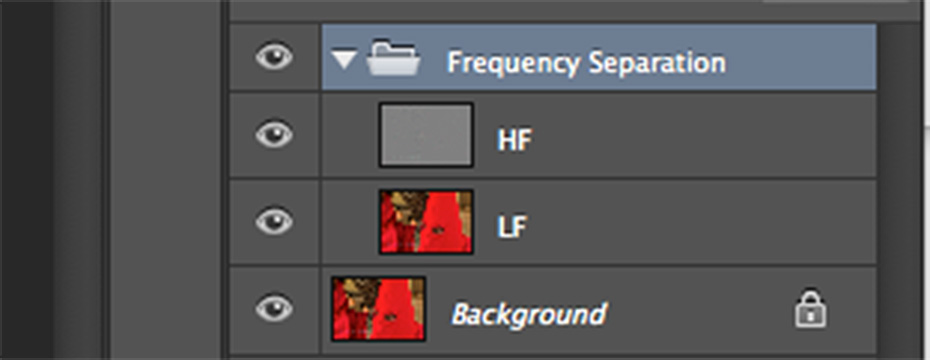
To get your image set up for frequency separation retouching, you will need to create 2 additional copies of your background layer. One layer for the high frequencies, the texture layer, and the second layer for the low frequency skin. If you are not starting from the beginning, add a Stamp Visible layer over all layers by typing Shift+Ctrl+Alt+E (Windows) or Shift+Command+Option+E (Mac) first.
Next apply a Gaussian Blur to the lower (low frequency) layer. Choose a radius that blurs out the skin texture, but don’t go too far as to make the face unrecognizable. What you are looking for here is just enough to blur the texture of the skin pores to the point the detail disappears, and just slightly more.
Next choose your high frequency layer and go to Image – Apply Image. Here you will want to set the Layer: to the low frequency layer. For blending choose Subtract and for Scale:2, Offset:128. These will be your settings every time, no need to ever change them.
Now you should have one layer with a blur (low frequency) and a layer above it that looks mostly gray (high frequency). Select the high frequency layer and change the blending mode to “Linear Light”.
Your image should now look identical to the image before you started the process.
Correcting Underlying Skin
To correct the underlying color (skin) choose an area with the lasso tool. I suggest feathering the selection to make it look more realistic. Use Q for Quick Mask as a quick way to see what your selection looks like. After you have made your selection choose the low frequency (blurred) layer and apply a Gaussian Blur in the selection. Choose a radius high enough to blend the tones together. Repeat this process over different areas of the portrait to smooth the skin tones. Because the texture is on a different layer, it should stay in tact during this entire process.
Correcting Texture
If you need to correct texture, I recommend waiting until after you do the skin tone. Select the high frequency layer and choose the Clone Stamp Tool. In the Clone Stamp Tool settings be sure to hit Sample: Current Layer. This will make sure you are just using the texture and not sampling anything else. Then on your high frequency layer sample good skin texture using ALT and then paint over “bad” skin texture. This will work very well for stray hairs, acne, wrinkles and other small blemishes.
Conclusions
This technique is a great pesky zit remover that can turn the tears of a teenager with a bad case of acne into tears of joy. Older women everywhere will love you for reducing crows feet, beauty marks, aging skin problems. Everybody will thank you profusely for removing the evidence under the eyes of last night’s party ;=)
Free Frequency Separation Action
If you want to skip making your own frequency separation layers, be sure to download the Frequency Separation Retouching Photoshop Action designed for use in Photoshop CC. It is available here Frequency Separation Retouching Photoshop Action.
Our thanks go out to Aaron Nace and the fine folks at http://phlearn.com for doing the video tutorial above, the automated Photoshop action, and sharing with all of us. You folks rock! Keep up the great work.
PLEASE RATE THIS STORY! [ratings]


