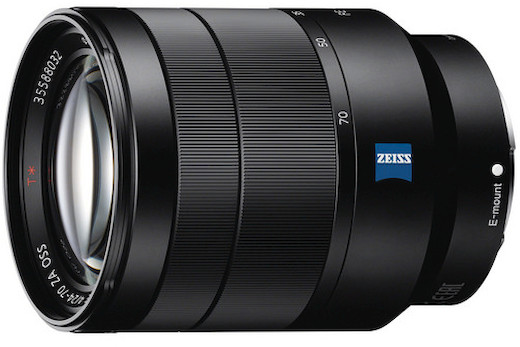
Sony 24-70 f/4 Teardown
Those of you who read our teardowns know that we commonly are tearing down Canon or Nikon mount lenses. The reasons are pretty simple and it basically comes down to the fact that we have a lot more of those lenses. If we have a lot more it’s less of a problem to take a couple out of stock for a teardown. Plus, we’re more likely to be doing repairs on them in-house so we need to know the layout. Not to mention, since we spend most of our day inside those lenses, we know our way around them pretty well and don’t look to stupid when we do a teardown.
But people who shoot Sony, or Pentax, or micro 4/3 ask us to rip apart their lenses, too. We’ve avoided doing that because of the above reasons and because we rarely try to repair them. But in the last few months, we’ve gotten motivated to look inside Sony E mount lenses. Partly it’s because we’re carrying a lot more of them. Partly it’s because repair costs on Sony lenses have become — well I like Sony, so let’s just say “fully valued.”
A few days ago, we sent a Sony 24-70 f4 ZA OSS to repair because it made a grinding noise and wouldn’t autofocus properly. That kind of thing happens all the time and the repair cost at most manufacturers is $200 to $300. When the service center told this would be an $800 repair, we decided to have them send the Sony 24-70 f4 back and take a look inside ourselves.
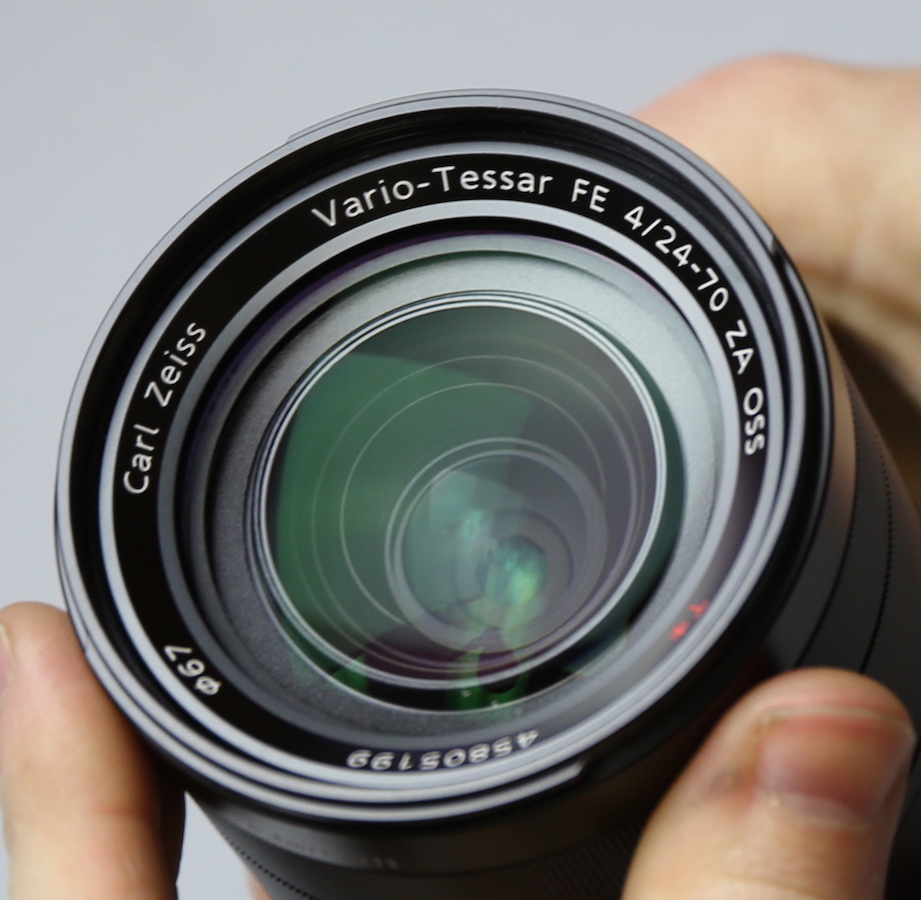
“Self Portrait in a Vario-Tessar”. Lensrentals.com, 2015.
One thing I like to mention before we start an article is what my expectations were on the front end. We know the Sony 24-70 f4, like most of the new Sony E mount lenses, has electromagnetic, rather than helicoid, autofocus. We also know that there’s a bit more optical variability in these lenses (making me think optical adjustments are somewhat limited). So I rather expected we would find the internal optics/electromechanical parts of the lens might be completely sealed; not repairable, only replaceable. That would go along with high repair costs, too.
I also need to mention that we do NOT know how to repair Sony lenses. We don’t have access to repair manuals, etc. This is not intended as a how-to-repair-your-lens article. We just thought you might enjoy watching us mess around with it and see what’s inside of the Sony 24-70 f4. Oh, and the usual disclaimers — if you do this yourself, it’s on your nickel. Also, I can’t respond to emails asking how to do this or that: you are many; I am one, and I really am supposed to be working much of the day.
By the way, if you feel the need to comment that we don’t take beautifully lit product shots during a teardown, save it for someone who cares. We’re tearing down a lens, trying to figure out how to fix it, and remembering how to put it all back together. We take a few hand-held shots while we do it, under the very harsh tungsten lighting we need to peer into the various nooks and crannies of the lens, so we can show it to you. If you want to look at beautiful pictures, go to Peter Lik’s gallery or something.
So Let’s Go Break Things In A Sony 24-70 f4!
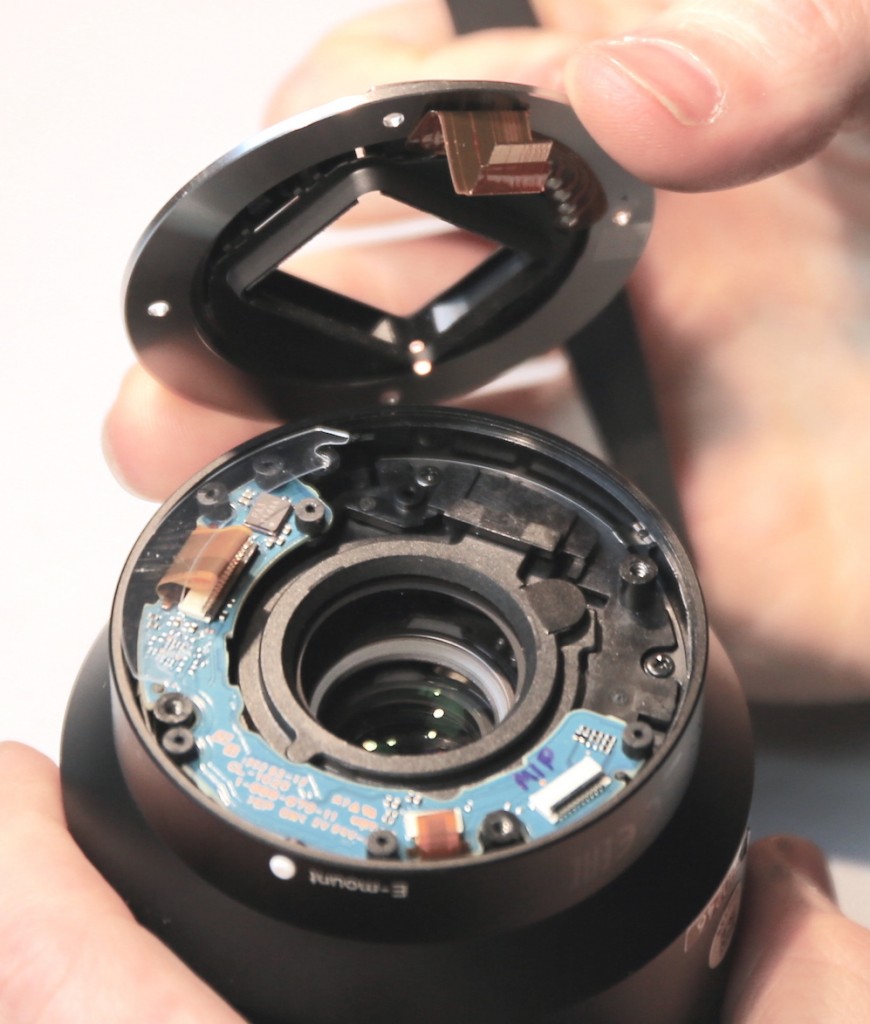
The bayonet mount comes off in the usual fashion: remove the four screws. With Sony lenses it’s usually simpler to disconnect the electrode flex from circuit board than to remove the electrodes from the bayonet.
Roger Cicala, Lensrentals.com, 2015
Sony doesn’t hold their PCBs in with screws like most manufacturers, they use adhesive rubber bumpers. I don’t have the slightest idea if it’s an advantage or disadvantage, it’s just different.
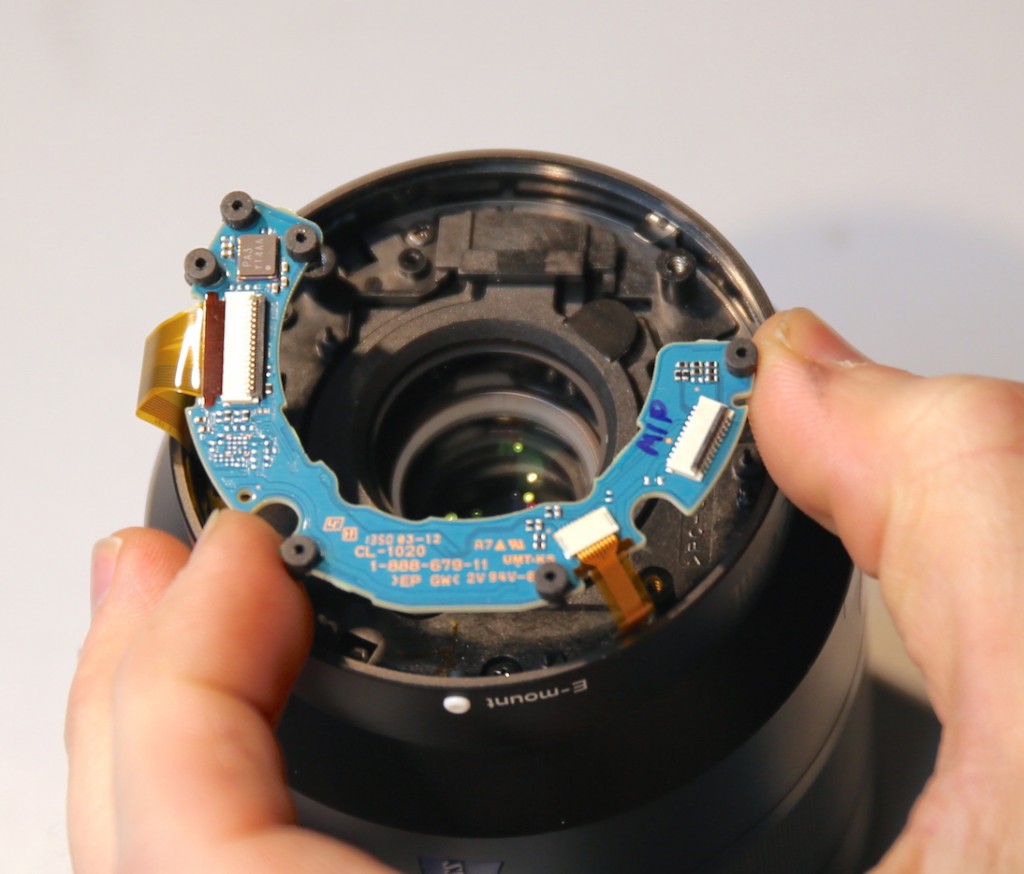
Roger Cicala, Lensrentals.com, 2015
With the PCB removed we get access to the four screws holding the rear barrel in place and can remove it.
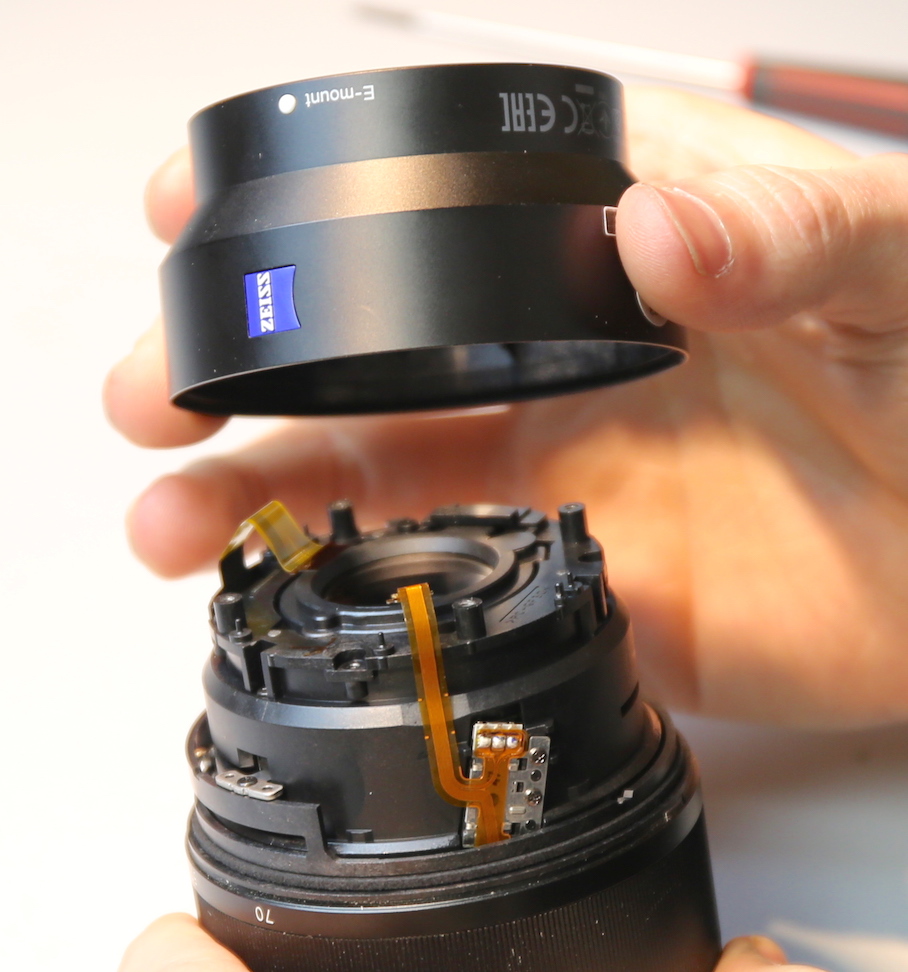
Roger Cicala, Lensrentals.com, 2015
That exposes the zoom keys, one on either side, that have to be removed to let us take the zoom ring off.
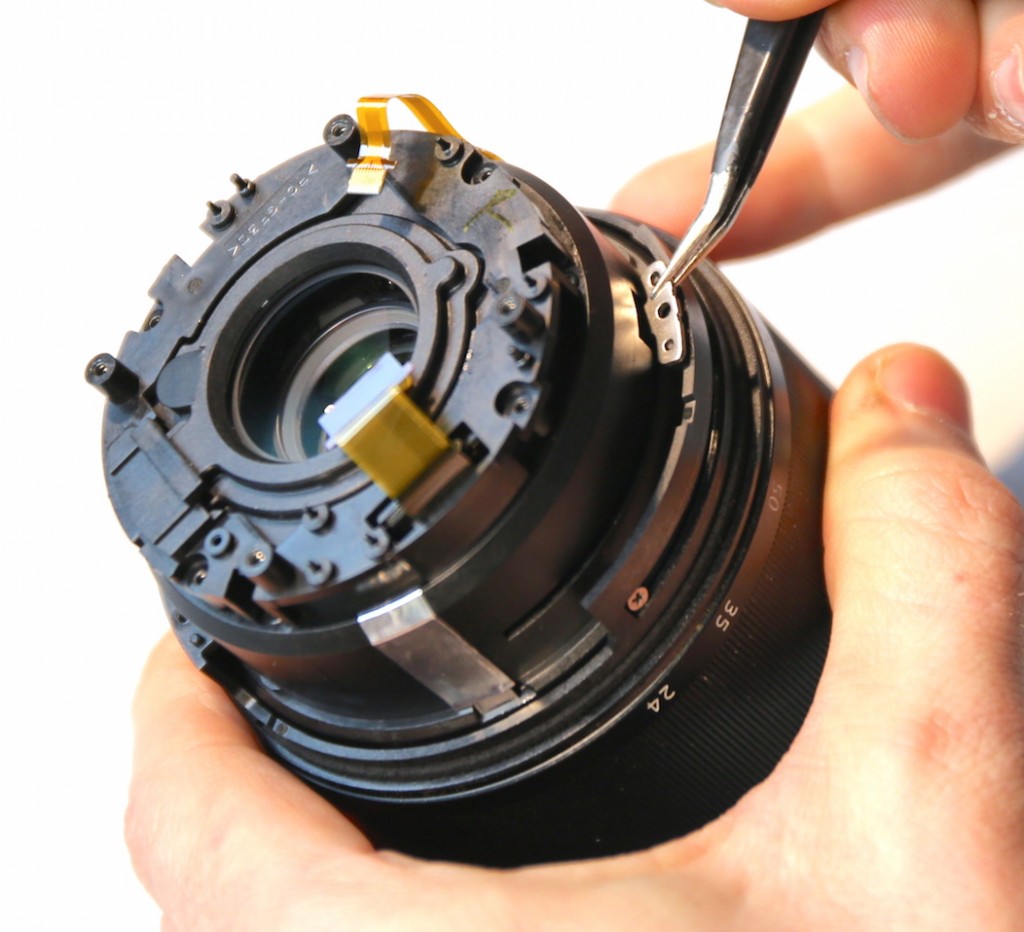
Roger Cicala, Lensrentals.com, 2015
Since we weren’t sure how the connections ran, we removed the screws holding the zoom position sensor before removing the zoom ring; part of the sensor was under the zoom ring.
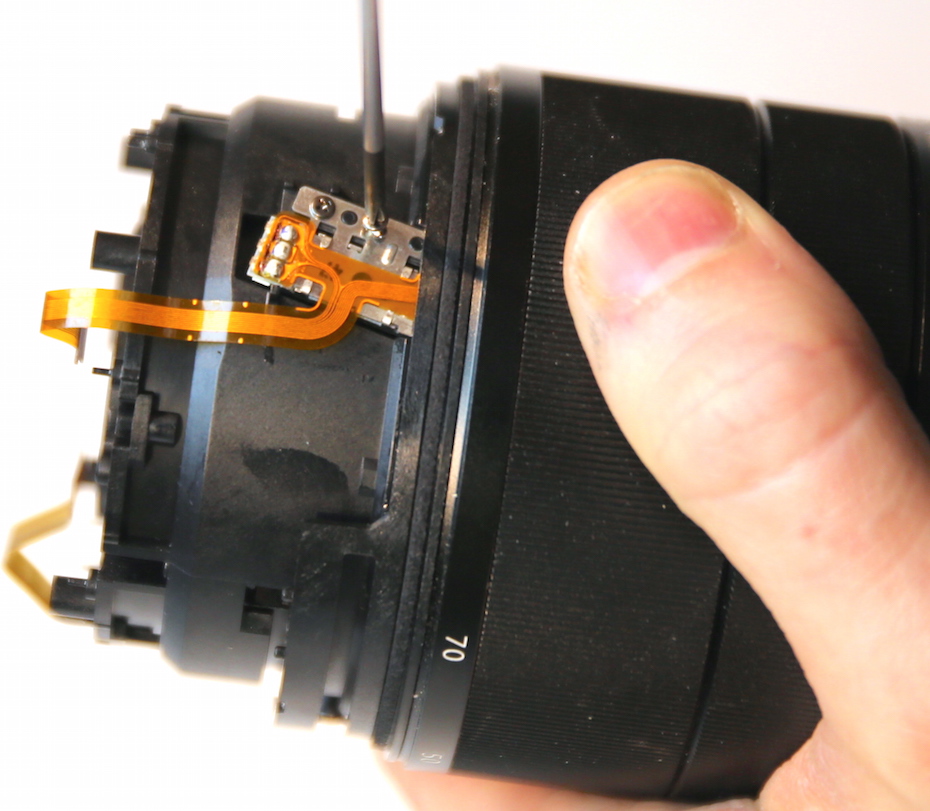
Roger Cicala, Lensrentals.com, 2015
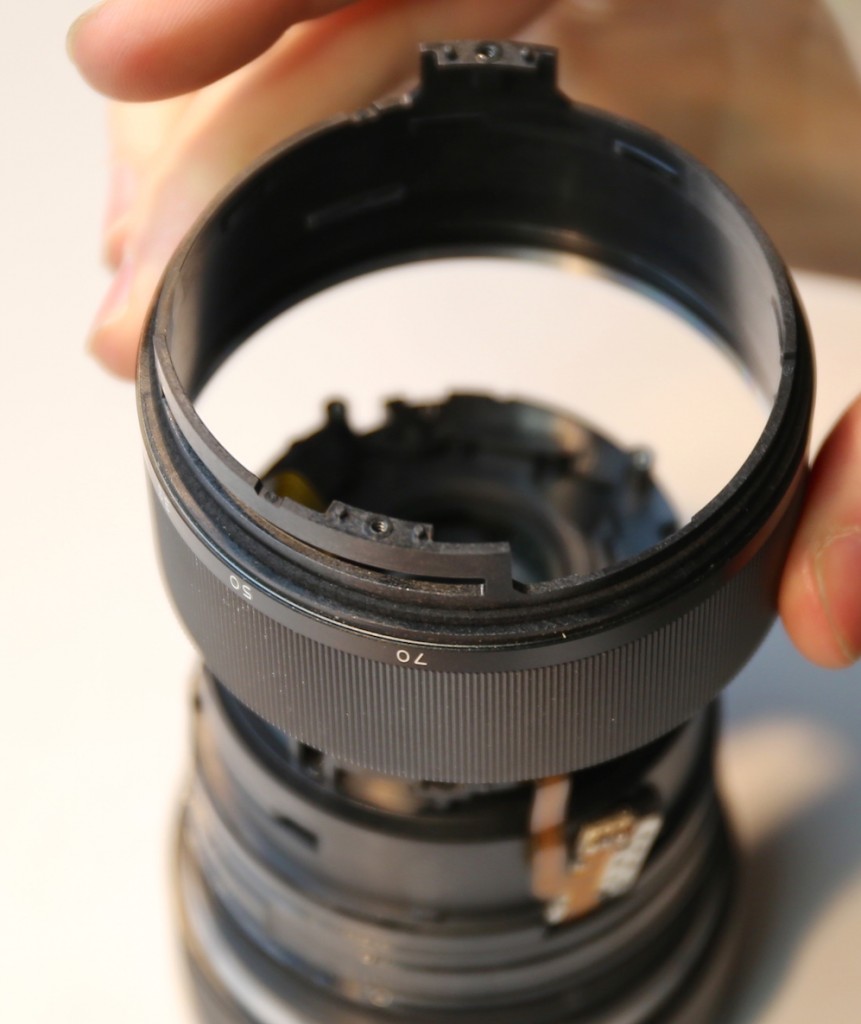
The zoom ring slides right off once the keys are removed and it’s rotated to the right position.
Roger Cicala, Lensrentals.com, 2015
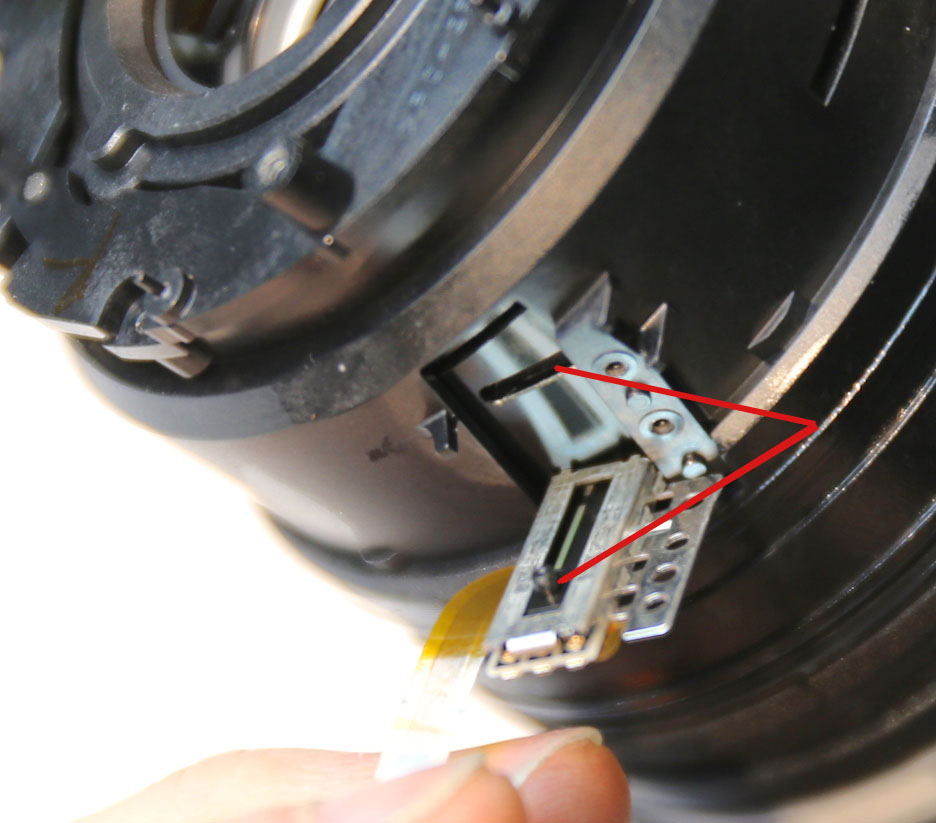
Now we can look at the working side of the zoom position sensor. It’s a simple slide inserted into a rotating helicoid (red arrows). That’s different than the electrical brushes and positions sensors that most lenses use, but certainly cleaner and simpler. I like it. Sure, the plastic tab could snap off, but the very thin metal brushes bend too, so I would think this is at least as reliable as a brush system.
Roger Cicala, Lensrentals.com, 2015
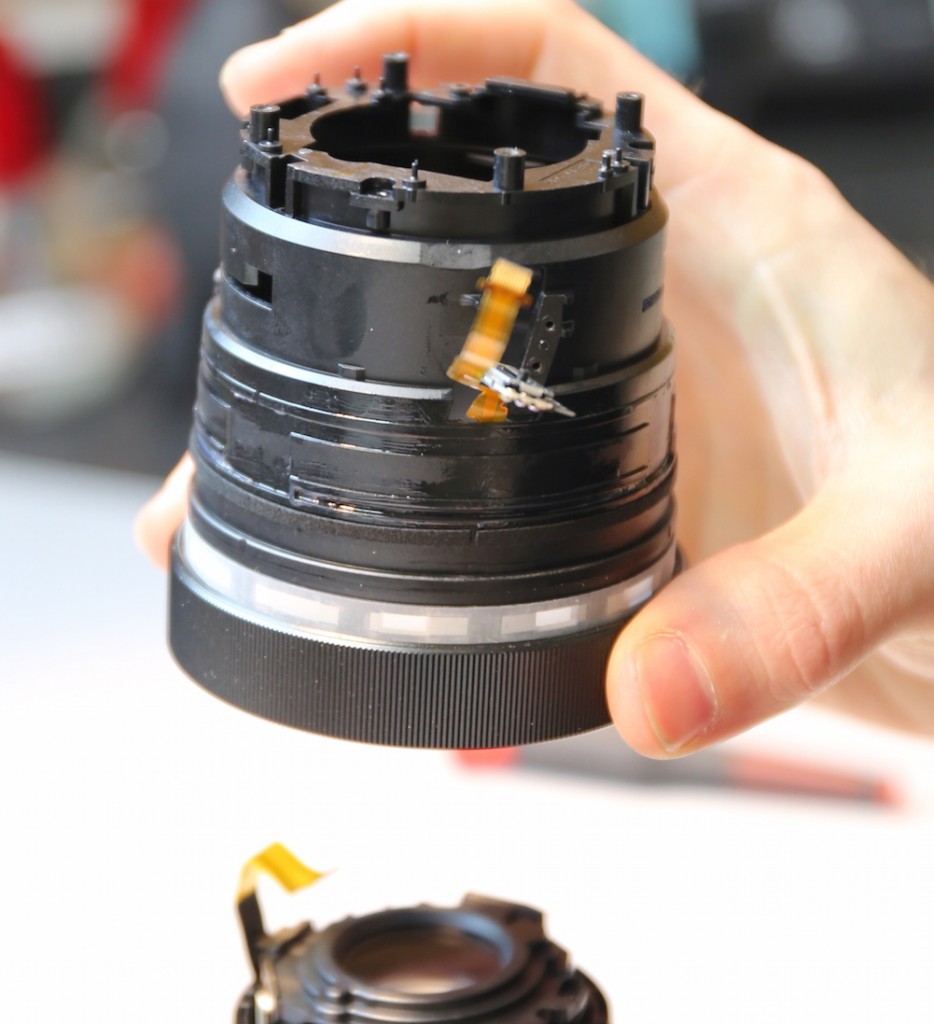
Moving right along, taking out another set of screws lets us remove the inner barrel.
Roger Cicala, Lensrentals.com, 2015
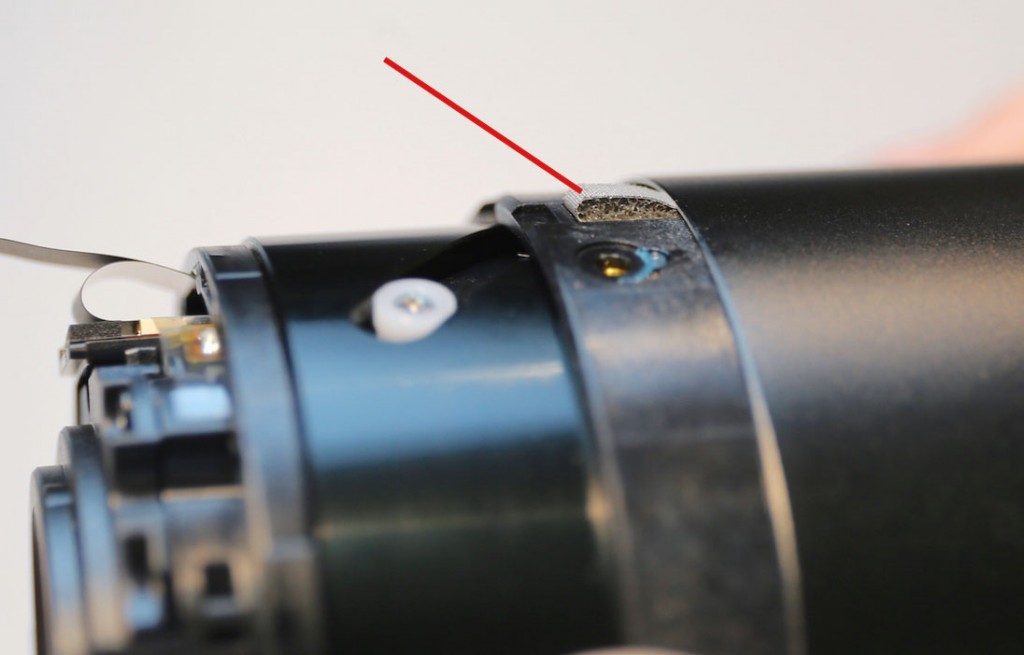
With the inner barrel removed we can see another nice touch that I wish all the other manufacturers would do. Sony places some cushioning strips between the extending barrel and the rest of the Sony 24-70 f4 lens. This makes things move more smoothly and also prevents the plastic-on-plastic catches that sometimes develop with extending barrels.
Roger Cicala, Lensrentals.com, 2015
The front barrel is held on with three screws inserted into large brass inserts, just like most lenses use. Removing these lets us remove the extending barrel of the Sony 24-70 f4.
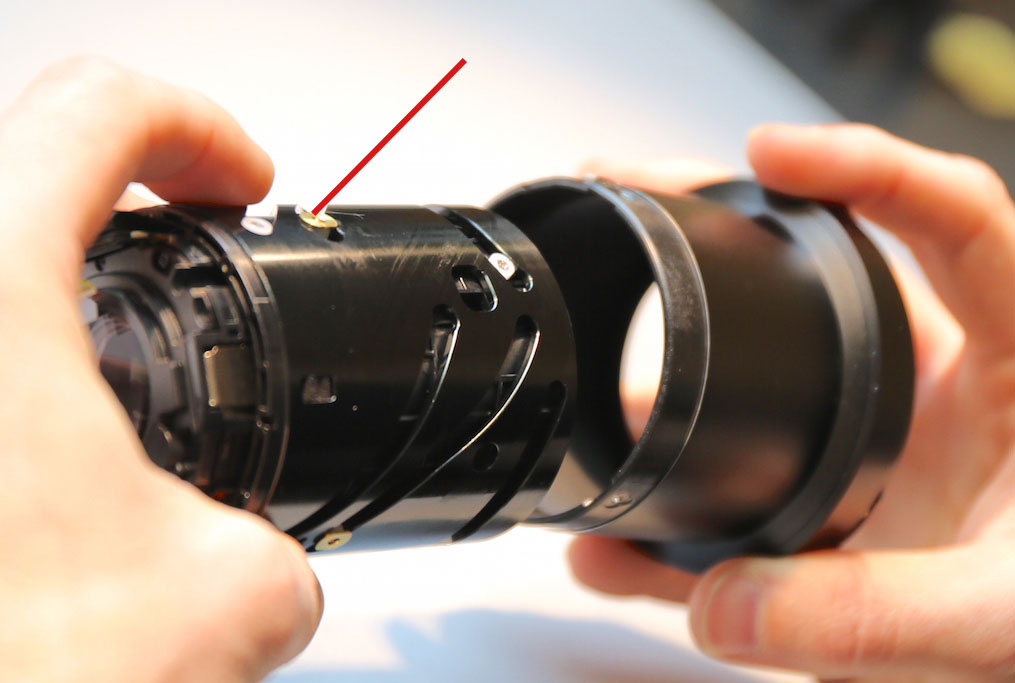
Roger Cicala, Lensrentals.com, 2015
It’s probably worth noting that with all the disassembly we’ve done, this is the first time we’ve removed any of the lens elements. The front element is removed with the extending barrel. Everything else we’ve removed has simply been structural or mechanical.
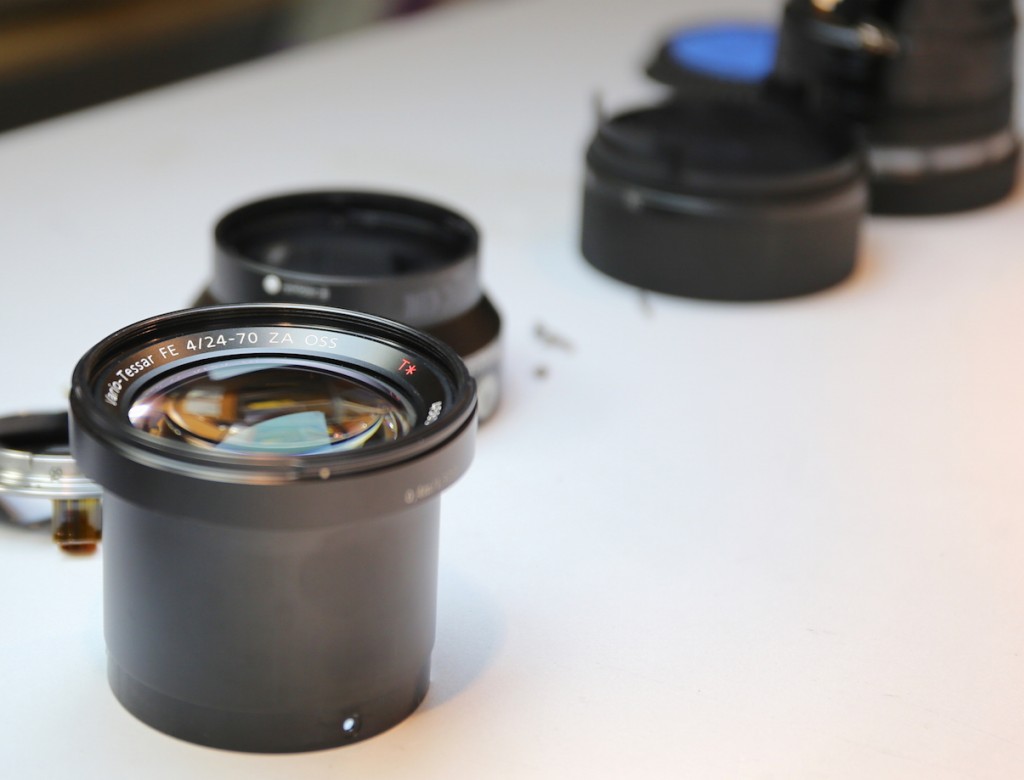
Roger Cicala, Lensrentals.com, 2015
What we’re left with is the central core of the Sony 24-70 f4 lens. This contains all of the glass (except the front element), the OSS unit, aperture, focusing motor, etc.
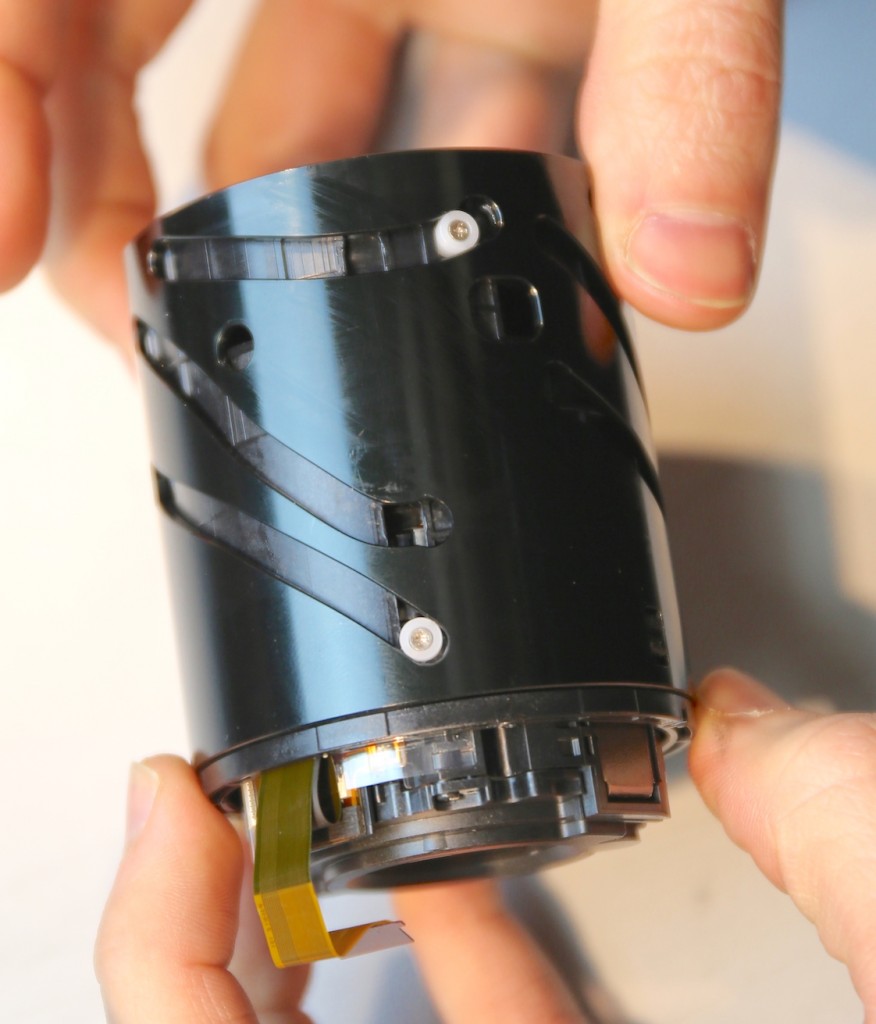
Roger Cicala, Lensrentals.com, 2015
We examined the Sony 24-70 f4 pretty carefully, looking for optically adjustable elements. There were the usual helicoid sliding collars (red lines) and one set of elements that had what appeared to be eccentric adjustable collars on them (blue arrow), but closer examination showed those collars seemed to be holding the OS element so it’s unlikely they have any optical adjusting capability.
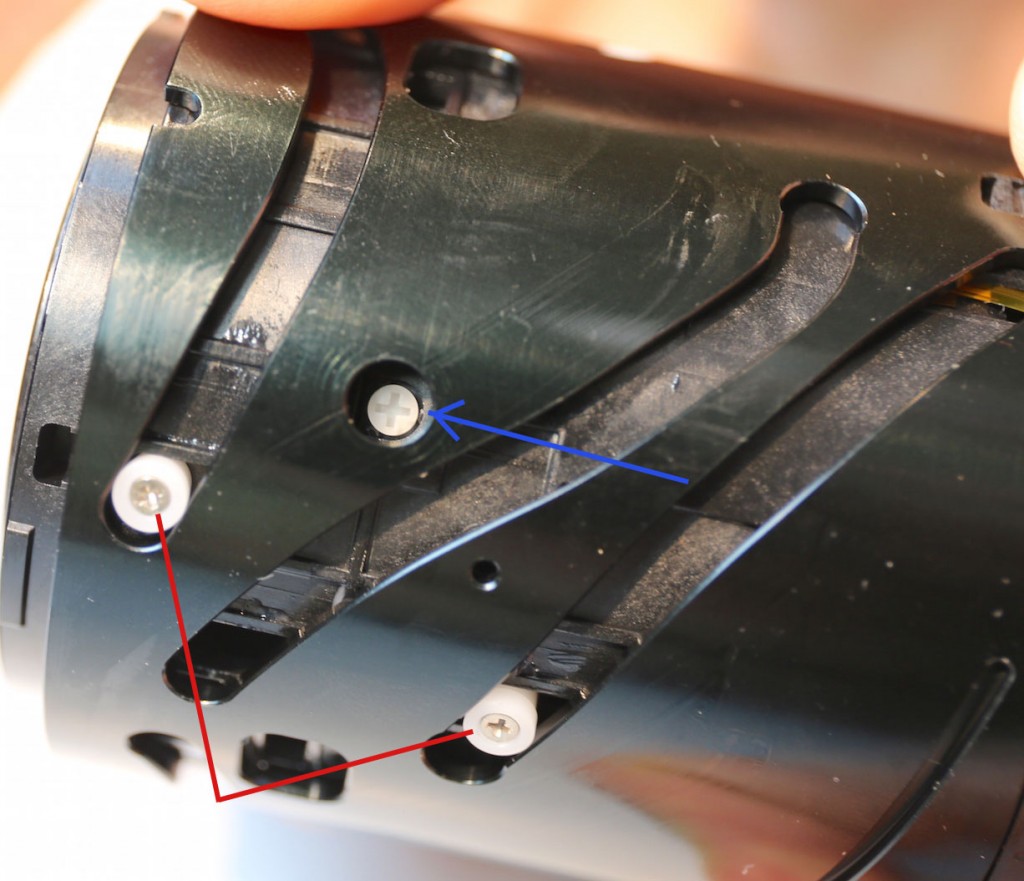
Roger Cicala, Lensrentals.com, 2015
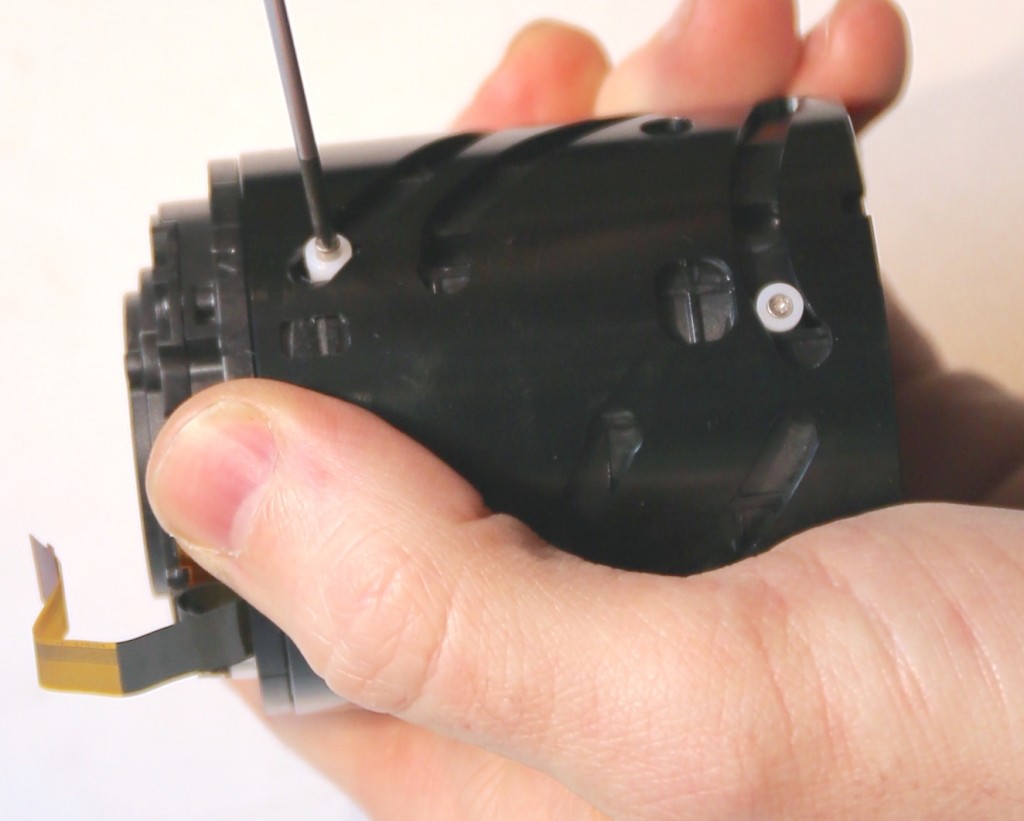
At any rate, removing the mount-side set of collars lets us remove the helicoid barrel.
Roger Cicala, Lensrentals.com, 2015
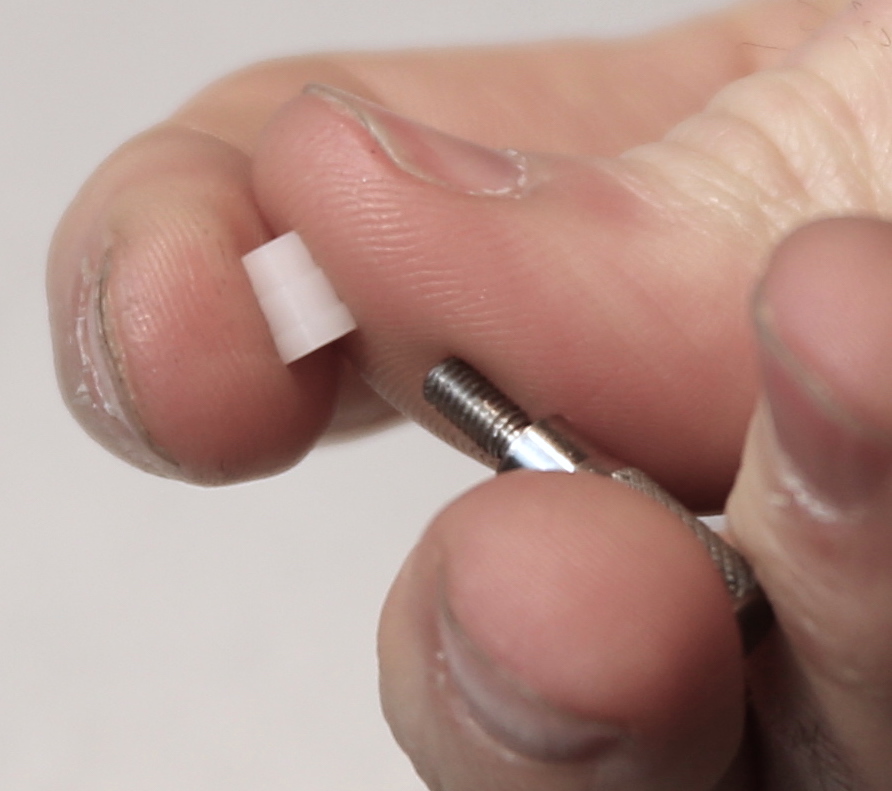
I should mention that these are thick, robust collars that look like they should hold up well.
Roger Cicala, Lensrentals.com, 2015
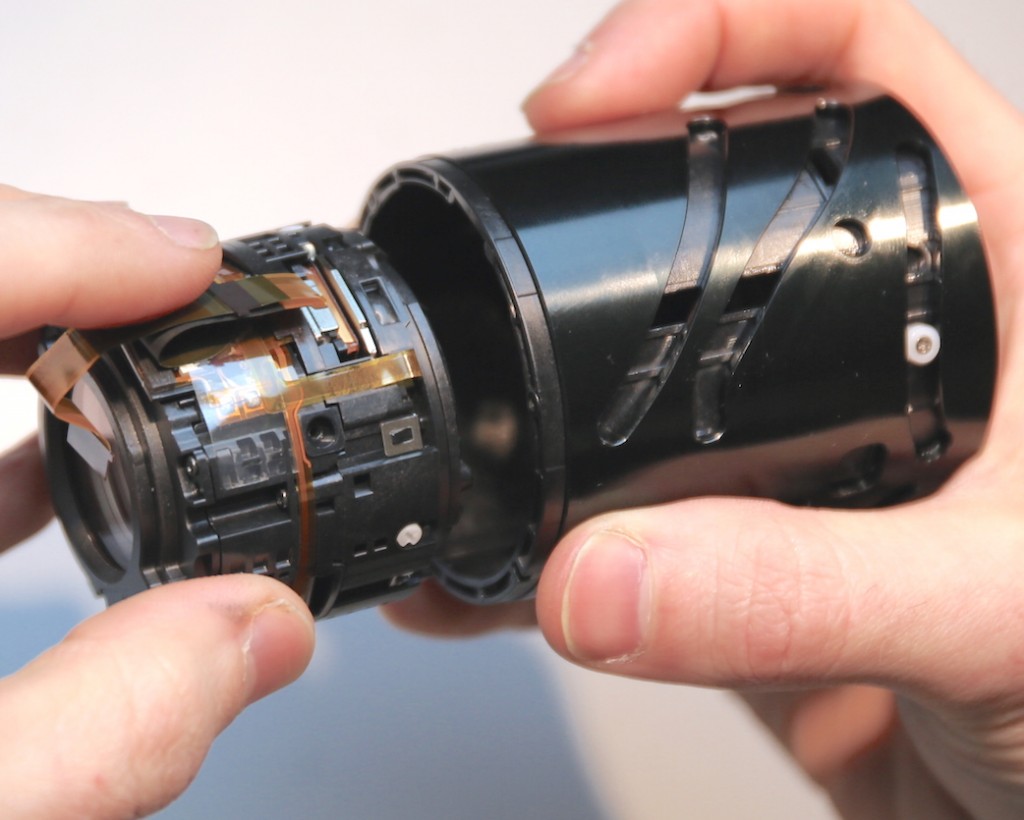
With those collars removed, the helicoid barrel slides right off the Sony 24-70 f4.
Roger Cicala, Lensrentals.com, 2015
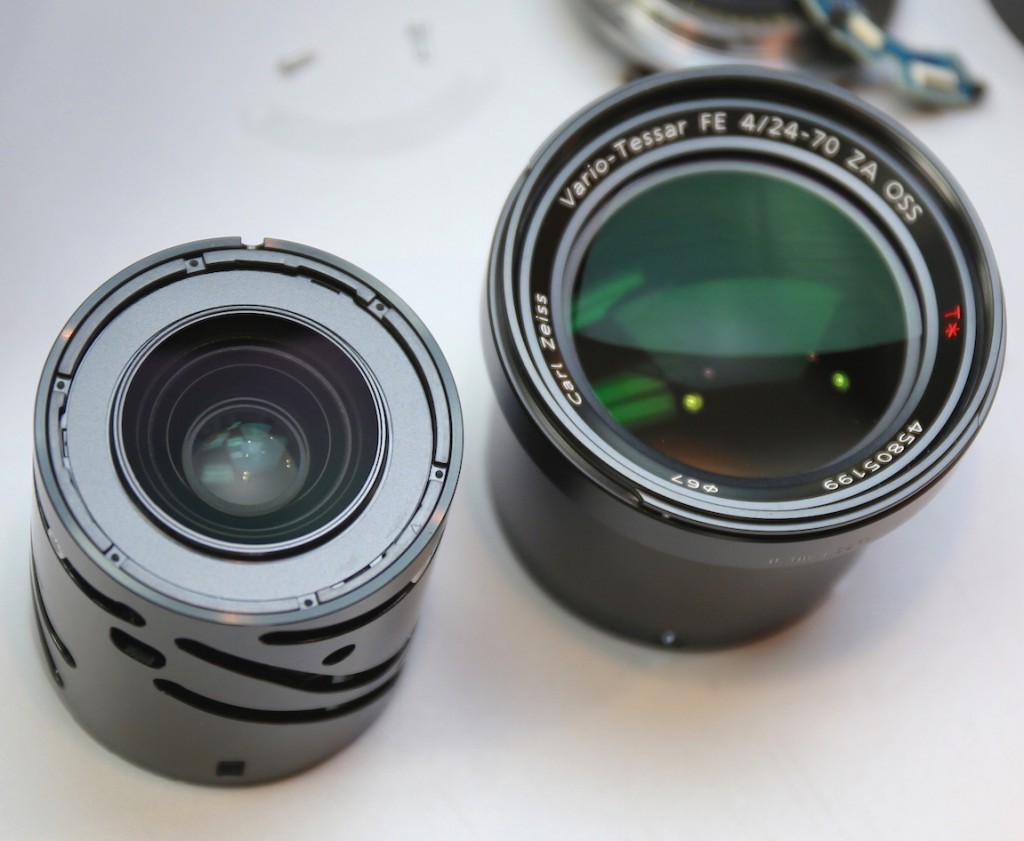
This barrel contains the second lens element, so now we have those two large elements removed and sitting in their barrels on the back bench.
Roger Cicala, Lensrentals.com, 2015
And what we are left working on is the small inner core of the Sony 24-70 f4 lens, which contains all the other glass elements, the OS unit, autofocus unit, aperture assembly (you can see that on the top), etc. This is where I expected we’d find, like many micro 4/3 lenses, this entire unit would be sealed and could only be replaced, not repaired.
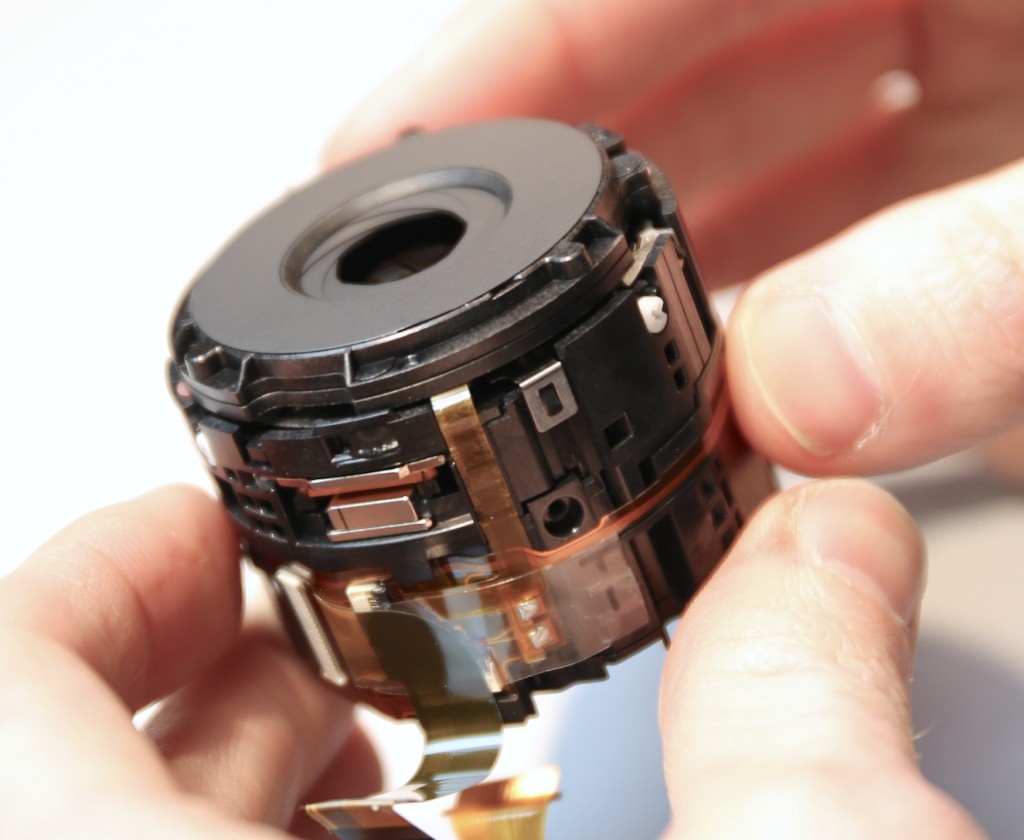
Roger Cicala, Lensrentals.com, 2015
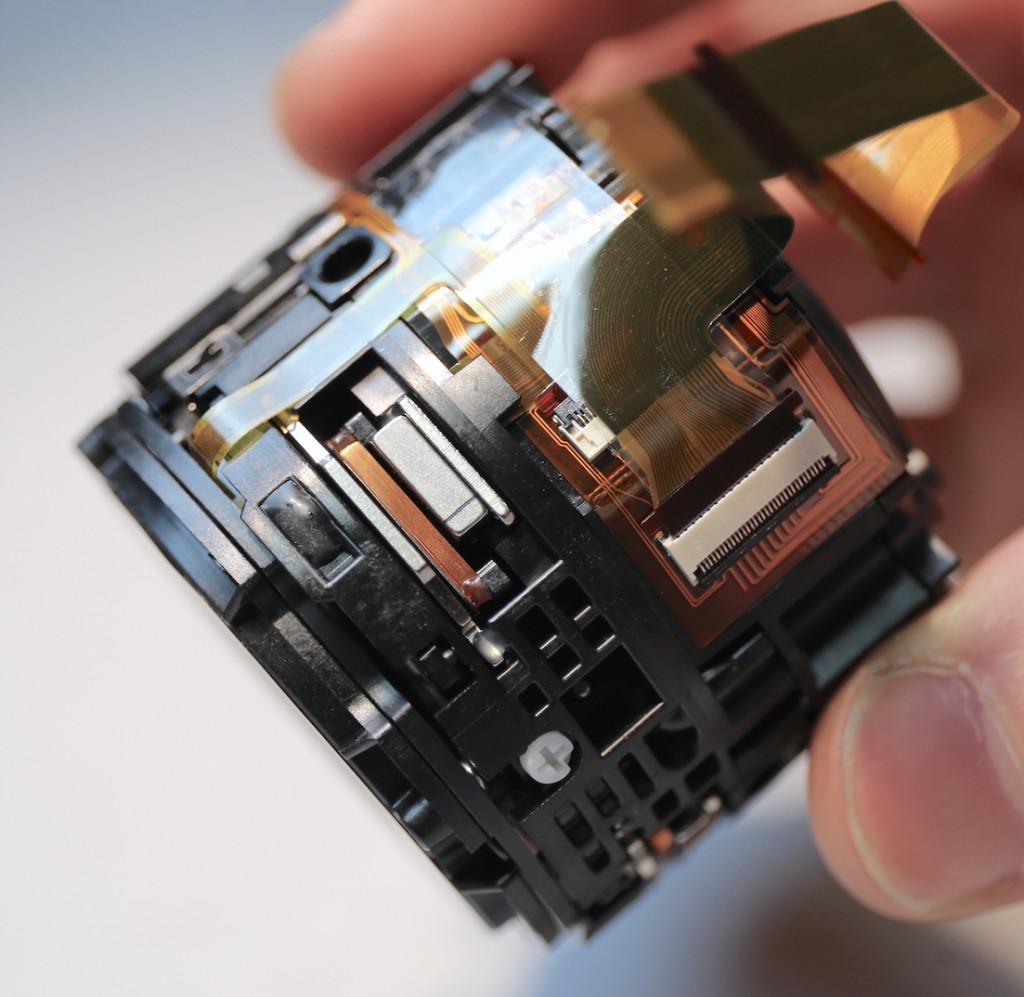
Roger Cicala, Lensrentals.com, 2015
But as very occasionally happens (very occasionally being defined as about 20 times a day), I was wrong less correct than I would like to have been. There were some nice obvious screws just waiting to be removed, letting us take the rear group off.
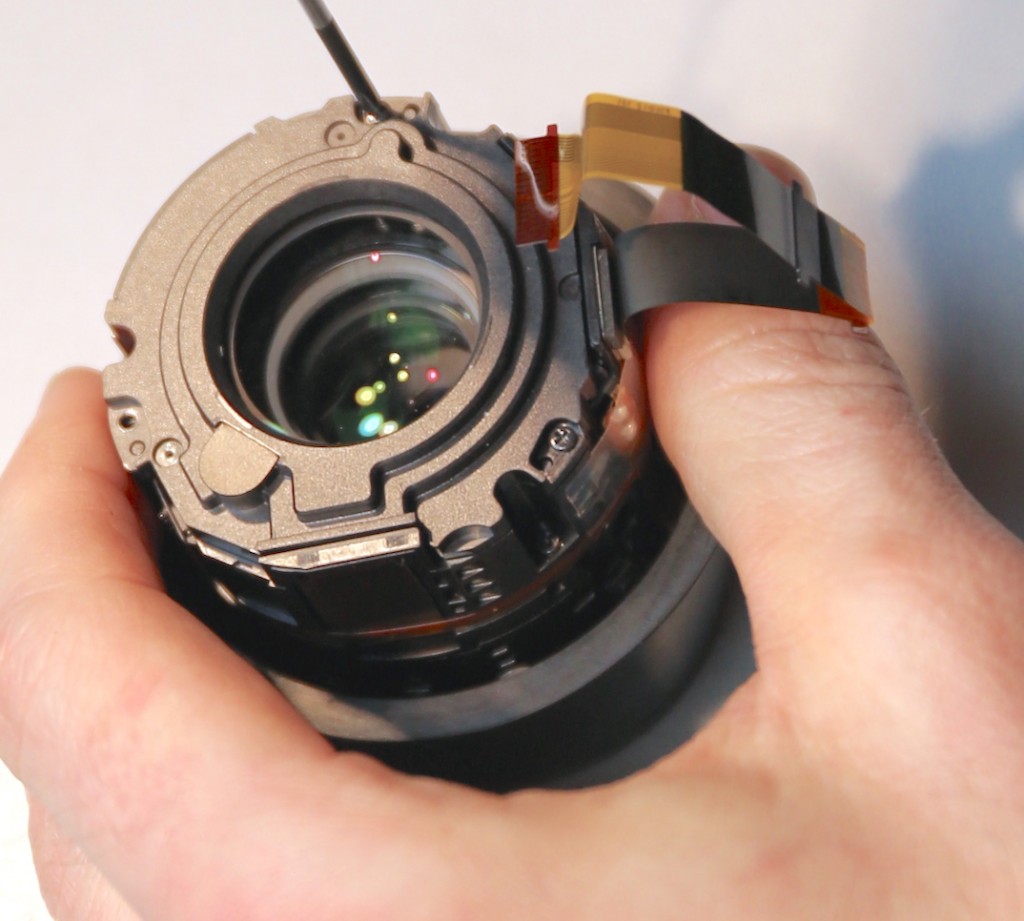
Roger Cicala, Lensrentals.com, 2015
With this group removed we can look directly down at the focusing element and the electromagnetic focusing mechanism. The focusing element is obvious. Rather than being moved by rotating through slanted helicoid tracks, it slides directly up and down on two metal posts (green lines), moved by the electromagnetic (red line), that receives power from a long, mobile flex cable (blue line). That’s a very different system than most SLR lenses.
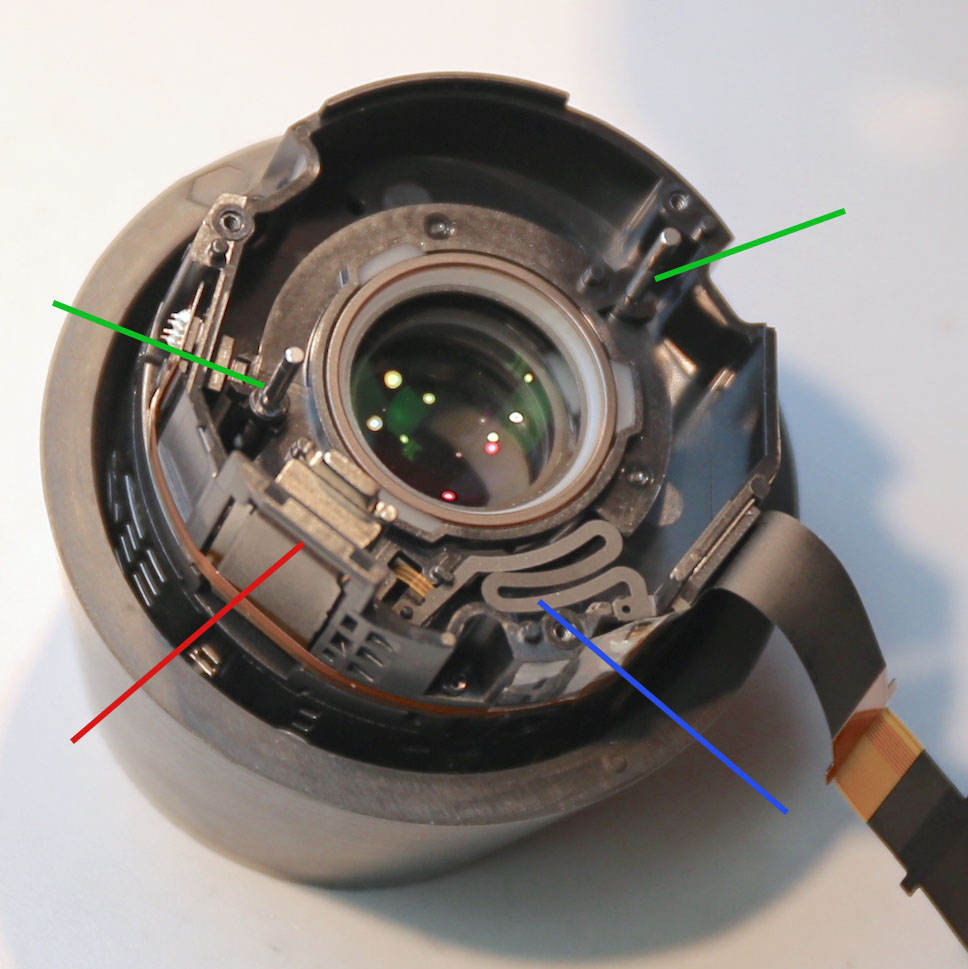
Roger Cicala, Lensrentals.com, 2015
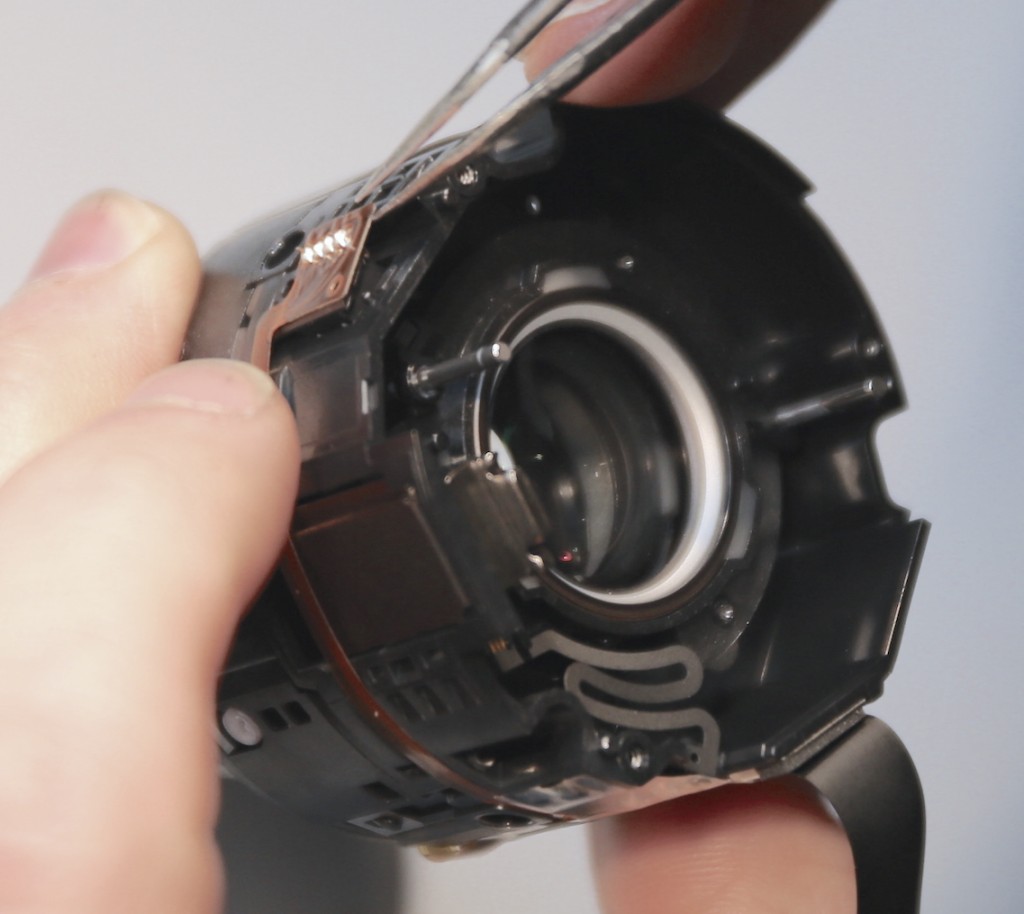
Since this lens couldn’t autofocus we took a look at the focus position sensor.
Roger Cicala, Lensrentals.com, 2015
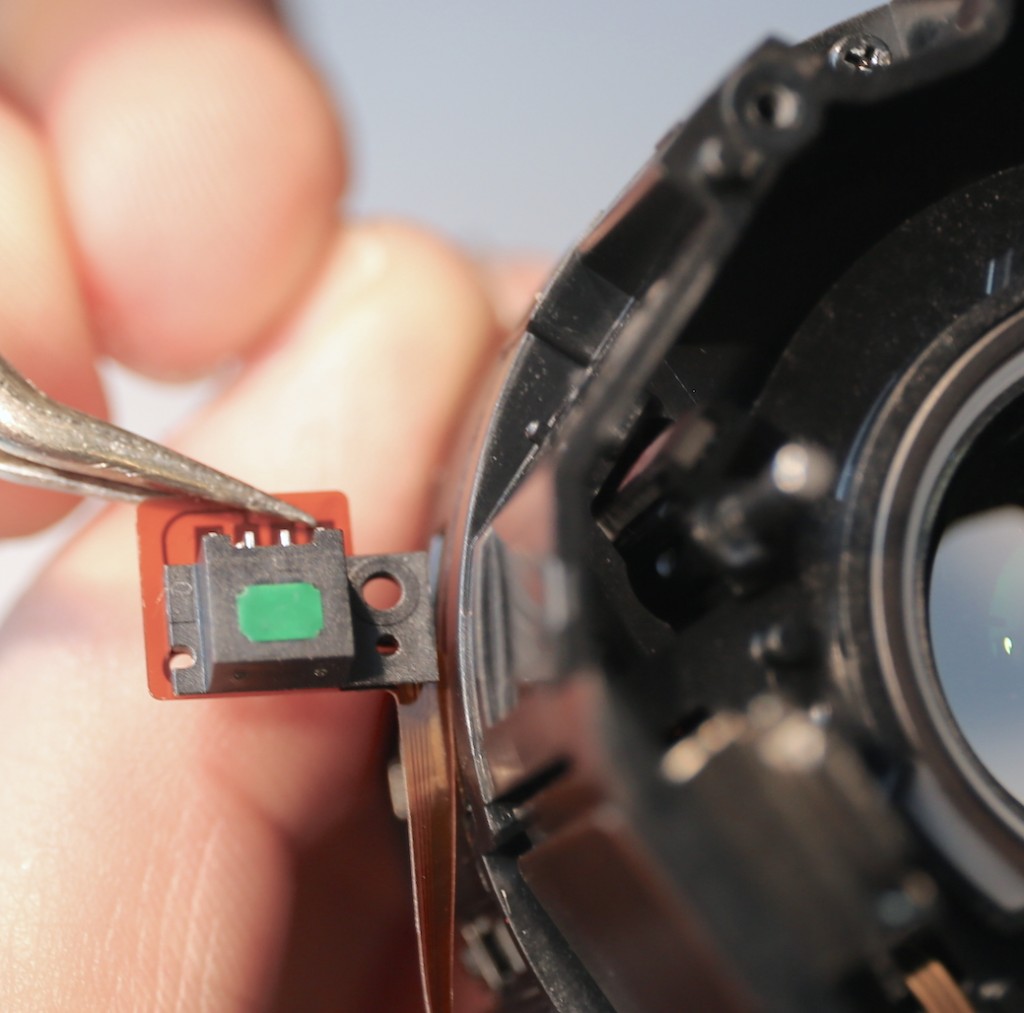
Focus position is probably more critical than zoom position, and this seems to be an electro-magnetic type of sensor (I’m not 100% certain – it might be some different kind of optical sensor), but at any rate, there were no obvious signs that anything was amiss with the sensor mechanism. (I know you’re thinking, so if you don’t even know what it is, how could you tell if something was wrong? Well, we could tell if it had a cracked flex, or broken solder, or stuff like that. But it could also be deader than dead and we wouldn’t have a clue.)
Roger Cicala, Lensrentals.com, 2015
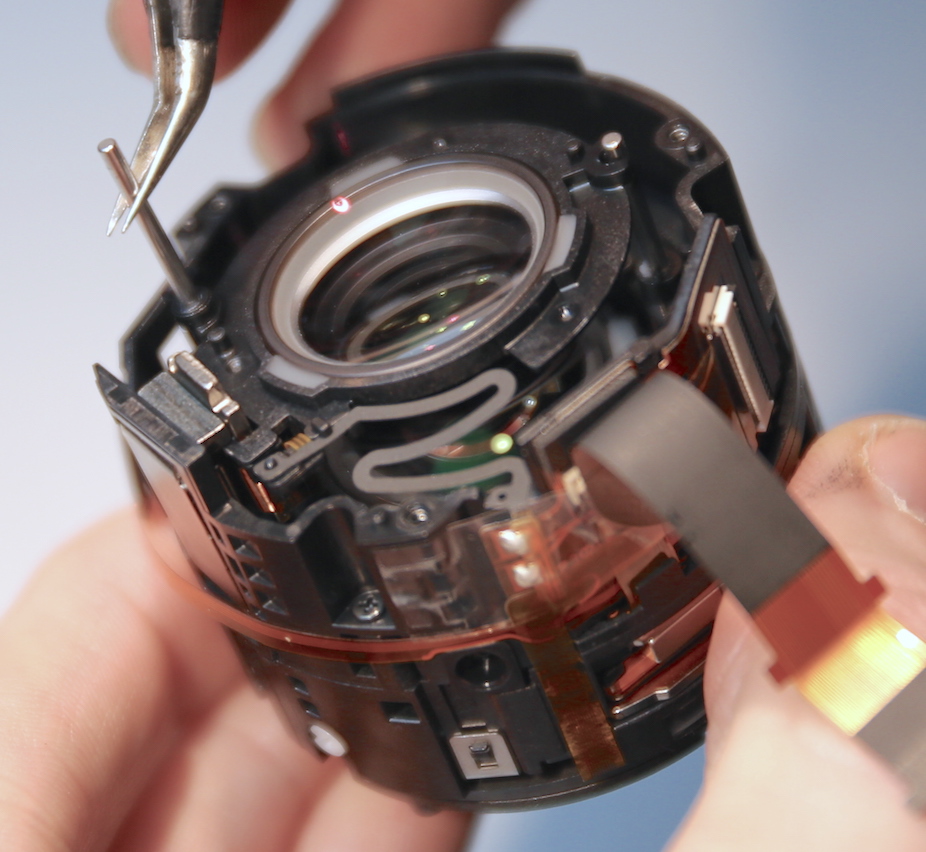
Since this lens was broken we were a bit more aggressive with messing with stuff we didn’t understand than we usually would be. We found out pretty quickly that the two metal rods the focusing element slides on could be removed.
Roger Cicala, Lensrentals.com, 2015
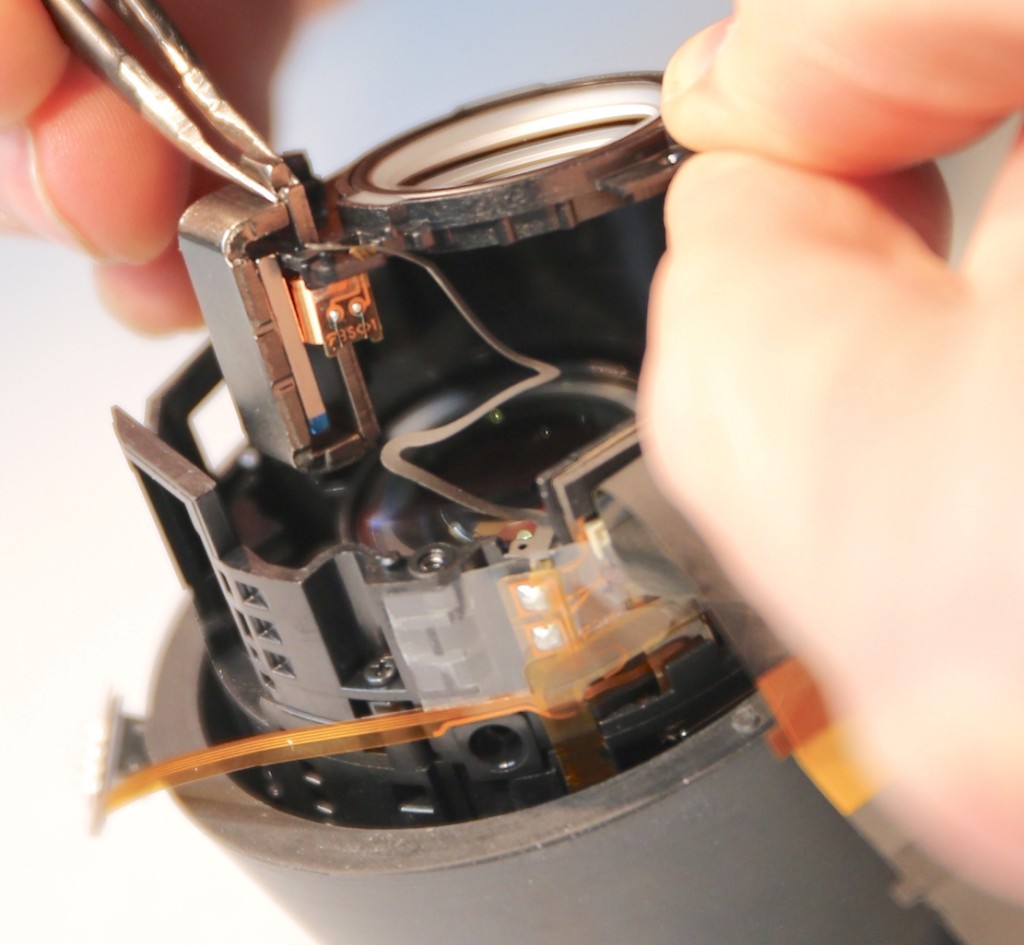
With the posts removed, we could pull the focusing assembly out of the barrel. You can see that the optical element just slides up and down within the eletromagnetic motor assembly.
Roger Cicala, Lensrentals.com, 2015
We didn’t have a lot of hope that we’d be able to fix things in here since we haven’t the slightest clue how it works. But once we started looking around we found an apparent problem. There was a dot of glue that apparently should attach the electromagnetic coil to the plastic housing of the focusing element, but the coil had become separated. You could see the imprints of coil in the glue, so it seemed pretty obvious they should be glued together.
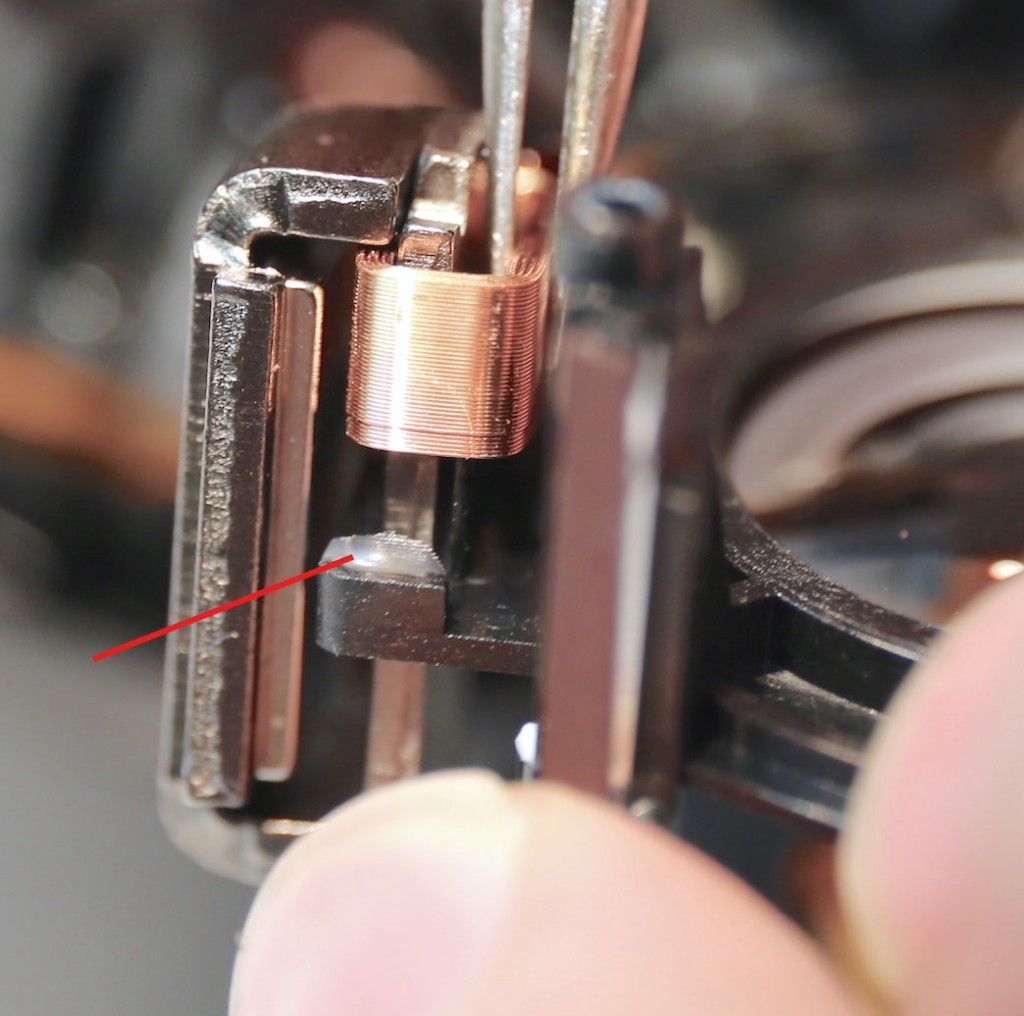
Roger Cicala, Lensrentals.com, 2015
We figured we had nothing to lose, so we glued it back. (Do not try this at home unless you have a good ventilated hood or something similar. Glue fumes can totally eat the coating off of lens elements. Or can add a layer of white residue. Depends on what glue you pick.)
Much to our shock, the lens works perfectly fine after our homemade repair; at least it has so far. We’ll keep it around here for a long while, though, to see if the glue we used fails since we don’t know exactly what type of glue is originally used and how our choice (made on the scientific basis of “well, it kind of looks like this”) will hold up over time.
This concludes our little disassembly and triumphant random repair story, but you know me, I’ll have a few random comments to make.
Roger’s $0.02
My summary is that the Sony 24-70 f4 OSS Vario-Sonar is just what I’ve come to expect from Sony lately. Some amazingly great stuff, some rather apparently stupid stuff, and some stuff that I don’t have enough knowledge to comment on.
The amazingly great stuff should be obvious. The lens is very cleanly designed and modular. We’d never been inside of one before, but had it completely disassembled in less than 45 minutes (it will take less than 30 minutes next time). The construction is robust for a small lens and there are several very nice touches, like the cushions under the extending barrel to keep the mechanism smooth.
The apparently stupid parts are pretty obvious, too. This lens seems beautifully designed for easy reparability, and I can think of no reason it’s more expensive to repair than similar lenses from other brands. Charging such high prices is going to alienate customers pretty quickly. It’s not too hard to get new customers, but it’s almost impossible to regain a lost customer.
I would add that glue applied to smooth surfaces is unlikely to hold up forever on a frequently moving part where the force of movement is across the axis of the glue. A tiny notch or clamp from the plastic mount to the coil would have created a much more robust connection and not cost a dime if someone had simply designed it properly in the first place. So much of the lens is so thoughtfully engineered that it’s a shame such a critical connection apparently was engineered as an afterthought.
It seems that there’s not much optical adjustment capability in this lens. There are some shimable areas under the front group that we didn’t show, and there may be some other adjustments we haven’t recognized on a single disassembly (possible, not likely). In theory, you could make a lens so tightly toleranced that it doesn’t need adjustment, or could test it at every step of assembly removing and replacing incompatible elements. But those two options are far too expensive for me to believe that they are actually being done, and anecdotal reports of significant copy-to-copy variation suggest they aren’t. On the other hand, an f/4 lens doesn’t need to be as critically adjusted as an f/1.4 or even an f/2.8 lens would.
I don’t have a clue if electromagnetic focus is more or less accurate, reliable, durable, or expensive compared to the standard USM type AF seen in most SLR lenses. But from most of the comments and my own experience using the lenses, it certainly seems to work quite well.
After we’ve worked on some more of these lenses (and it seems likely we’ll have to do that) we may get a better idea about some of these things. But this first glimpse was interesting.
Roger Cicala and Aaron Closz
April, 2015
Original post from Lensrentals.com, posted here with Roger’s permission.
Please rate this story, and share it with your friends? [ratings]


